Friday, May 5, 2017

Happy Day Butterfly Circle Mom Card (#18/52) {05.05.2017}

Happy Day circle card for Mommy! I had so much fun with this card. Let's check it out, shall we?

I started by scoring and folding cardstock, and then die cutting it with a circle, with the edge of the die just over the edge of the paper at the scored and folded edge. This allows the card to remain intact across the fold line while also being shaped in a circle. So awesome! I used the Spellbinders Standard Circles Large and Spellbinders Petite Scalloped Circles Small die sets for this card. I cut the card base and then cut a scalloped circle and cut out the inside of the circle to create a frame. I used the standard circle die and cut a piece of vellum for the inside of the frame. For the sentiment, I die cut the Happy die from Alt E New, in black cardstock, and two times in white cardstock. I layered the two white ones together, and then adhered it to the black but slightly shifted to give a shadow effect. I also stamped out the "day" sentiment, from Alt E New's Halftone Happy stamp set, onto vellum, with Versamark Ink. I sprinkled on Sparkle N Sprinkle's White Detail embossing powder, and heat embossed it. I die cut out the "day" sentiment with the smallest circle, and layered up all the sentiments over the front of the card. I also cut die cut green paper with the Wildflower Corner die from Memory Box. I layered this over the vellum circle, and then die cut again with red paper. I inlaid the red flowers into the green die cut wildflower corners. Here is one of the flowers and the embossed sentiment below, along with some bling for one of the butterfly trails :)


I also die cut a butterfly, using the Pippi Butterfly die from Memory Box. Here is the butterfly with orange cardstock.

Most of the cardstock I used for this card is sparkly, all of them except the orange in the butterfly sparkle :) Here is a close up of the sparkly blue! These papers were perfect!

I also die cut another butterfly in black, then die cut it again in gold, orange, and vellum. I inlaid orange and gold into the black butterfly. Then, I layered the vellum and gold cardstock butterfly pieces over the base. I bent up the wings to give some dimension. Here is a side view of the triple layer inlaid butterfly!

This was a really fun card to make, and I like how it turned out. I think Mom will like it.

I am also submitting this card to the Cardz 4 Galz Shaped Card Challenge #46.

Thanks for stopping by. Have a magical day!

-Chris

Sparkle N Sprinkle compensated links are used when possible.

Monday, May 1, 2017

Dragonfly & Butterfly Z-Fold Birthday Card {05.01/2017}

My good buddy, who loves dragon flies, had a birthday ... so, what does one do? Make a dragon fly birthday card! I started out by creating a Z-fold card panel. I cut a 12" piece of cardstock on an angle and then scored it at 4" and 8". Then, I folded the card together and decorated it up. This is the card CLOSED. I have additional images below which show it opened and other parts to it.

Here is the card OPENED. I stamped the Enchanted Mum Bouquet mums image from Heartfelt Creations, with purple ink, onto the purple cardstock. This gave me a tone-on-tone look. I also die cut a butterfly from an old butterfly die set (maybe from Spellbinders?). I also die cut some cat tails and dragon flies from another random die set that has been in my stash since dirt was created.

I also created a mum flower, using Heartfelt Creations' Enchanted Mum Die. I die cut the mums out and layered them all up to create a dimensional flower. I squeezed on some of Sparkle N Sprinkle's Dimensional Glue to the inside of the flower, and added in some Royal Purple Glass Glitter to the inside of the flower. I also used a Nuvo Glue Pen (fine tip) to add additional adhesive and sprinkled on Sparkle N Sprinkle's Lacy Lilac glitter. This made the mum really pop and sparkle!

And, because it was a birthday card, I had to include a sentiment! I stamped out a sentiment using Lawn Fawn's Happy, Happy, Happy stamp set with black ink. Then, I sprinkled on Sparkle N Sprinkle's Sparkle embossing powder and heat set it. This made the sentiment sparkle and shine!

My friend loved this card - it was so much fun to make, and I love this Z-fold style card. It is interactive, different, yet can still fit into a standard A2 envelope (without all the dimension I added here).

And, I am entering this card into Cardz 4 Galz - A Shaped Card - Challenge #46.

Thanks for stopping by. Have a magical day!

-Chris

Sparkle N Sprinkle compensated links are used when possible.

Sunday, April 30, 2017

Sparkle N Sprinkle May 2017 Reveal {05.01.2017}


SPARKLE N SPRINKLE MAY 1ST REVEAL


SPARKLE N SPRINKLE MAY 1ST REVEAL

Hi there and 
Welcome to the Sparkle N Sprinkle
 May Reveal Blog Hop!

NEW STORE - NEW BLOG - NEW PRODUCT LINES!
There are EIGHT new rubber stamp sets being released this month, plus a new Digi Papers set, and two huge Digi Bundles.

The sets are:

840 - Happy Flowers  
(digi version DIGI840FS - see below)

844 - True Beauty  
(digi version DIGI844B)
(digi version DIGI845BG)
(digi version DIGI846BG)


847 - Kaitlyn Mermaid  
(digi version DIGI847LS)

848 - Rory Batter Up  
(digi version DIGI848LS)
(digi version Digi849-850B - see below)
(digi version  Digi849-850B - see below)


Digi849-850B - Graduation Bundle (combines both sets plus includes additional images)

Digi840FS - Happy Flowers Bundle (includes additional images, decoupage sheets, digi papers)

Digi4004FS - Rainbow of Pastels Patterned Paper Pack (Digi Papers)


The new sets are 20% off until May 3, 2017, so after the blog hop, hop on over to the NEW STORE and have fun shopping - be sure to check out the OTHER amazing new products as well! 


Be sure to check out the new SNS Blog, which can be found here!


On May 3, ONE GRAND PRIZE WINNER will be selected from the comments left on all the Designers' blogs listed below.  Please leave a comment with each designer to be eligible for the Grand Prize (checked for compliance).  The Grand Prize Winner will be announced on the SNS Facebook page and the SNS New Blog.  


Also, when you purchase the digi versions of any of the SNS rubber sets, you are getting lots of extras that aren't available otherwise.  These extras include additional images not available with the rubber version, digi papers (in some cases), and now a cut file to use with your electronic cutting machines will also be included with all digi images purchased!

You're definitely going to want both the rubber versions as well as the digi versions of all our new releases.


The new sets are 20% off until May 3, 2017.  So once you finish the blog hop, head on over to the New Store and start shopping.

On May 3rd, ONE GRAND PRIZE WINNER will be selected from the comments left on the Designers' blogs listed below. Please leave a comment with each Designer in order to be eligible for the Grand Prize.  You never know who the Mystery Designer will be that has the winning comment.

The Grand Prize Winner, which will be announced on the SNS Facebook page and the SNS New Blog, will receive ALL of the new rubber stamp sets revealed this month.


The Blog Hop Order this month is:
Chris <<<<<<You are HERE!>>

(*Tip: if you have difficulty with a particular link, try clicking on the Designer's blog title to send you to their Home page.)


We hope you enjoy the New Reveal Blog Hop as much as we do.  Thanks for joining us and remember to comment on each of the Designers' blogs to be eligible for the Grand Prize.  
 Wonder who the Mystery Host will be this month????


Have you checked out the SNS YouTube Channel featuring Demo Donna?  If not, then you are in for a real treat.  Subscribe today to get all the latest Demo Donna tips and techniques!


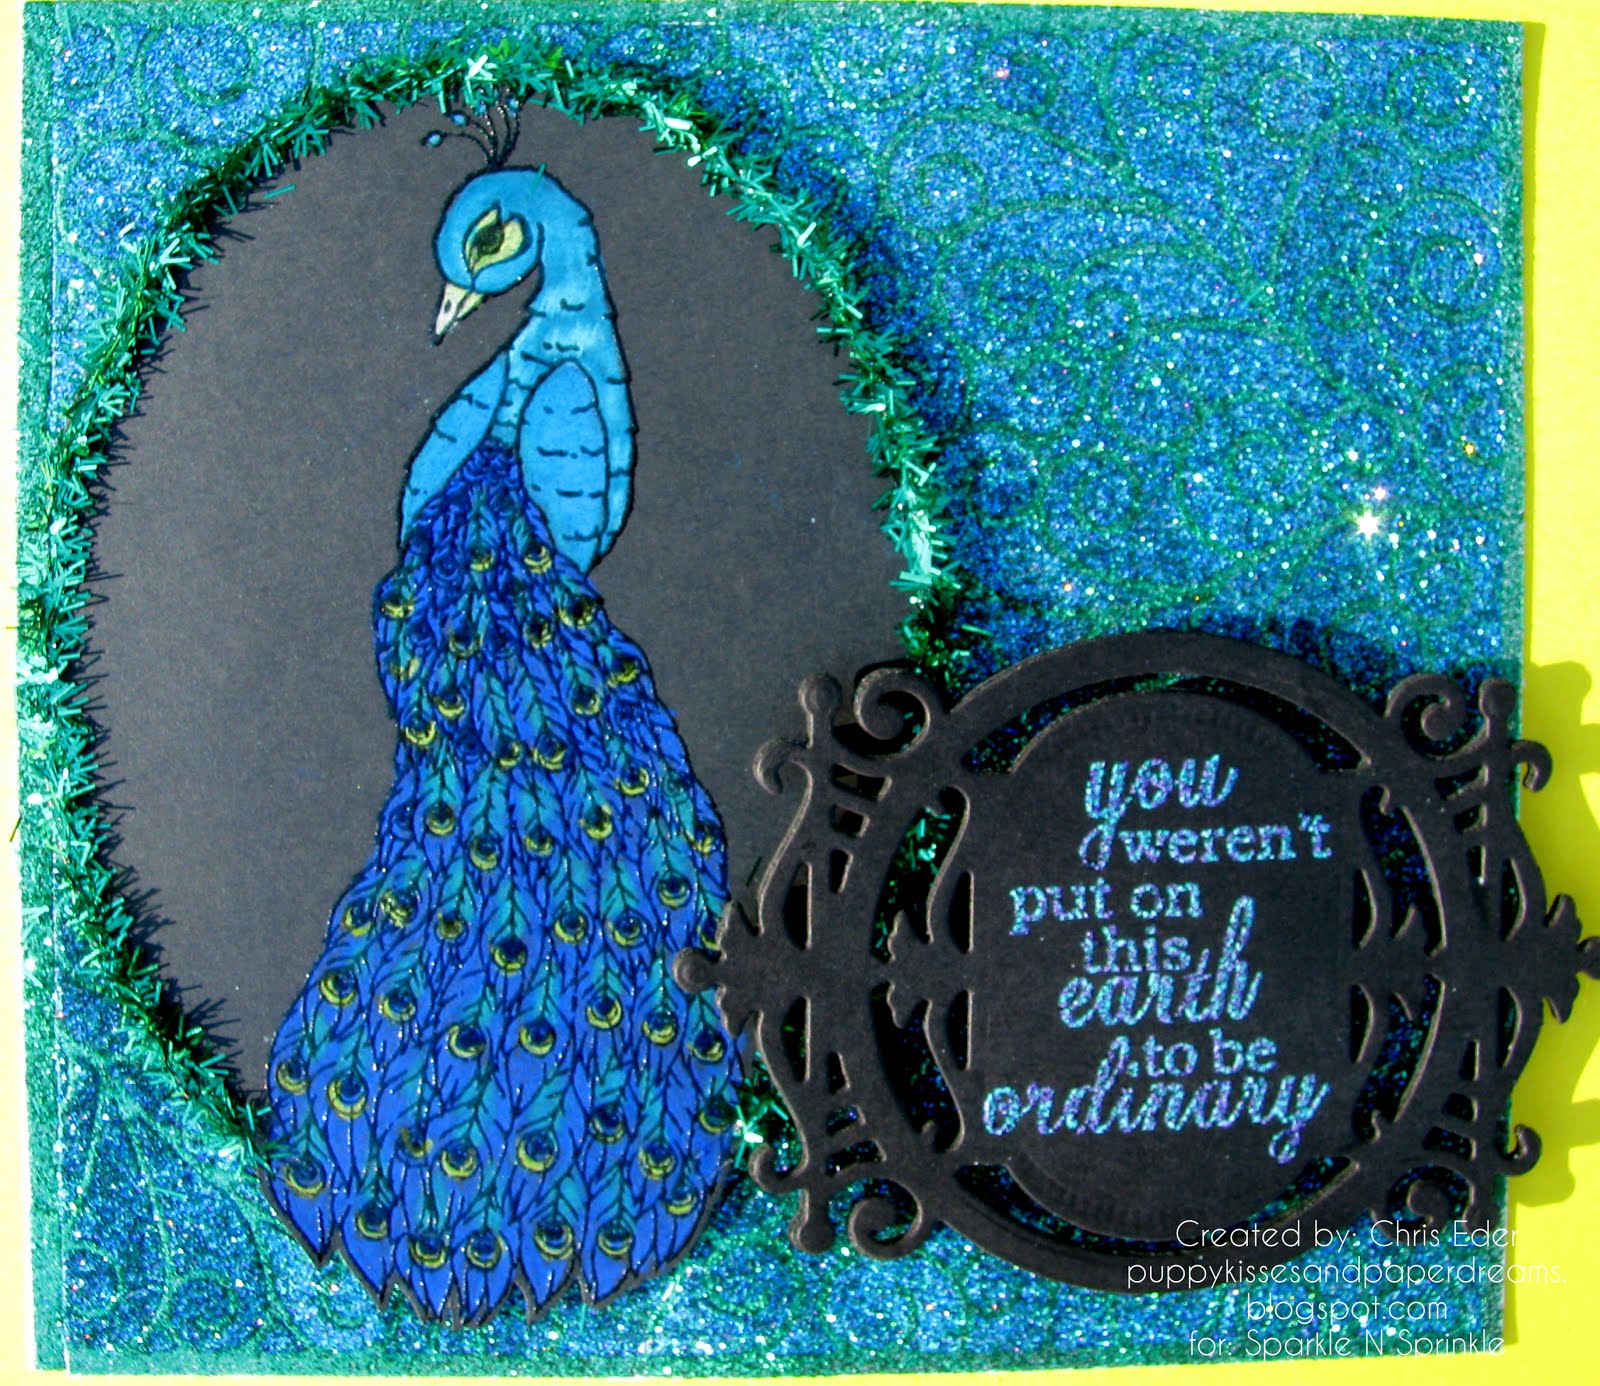
And, now a little about my card! I fell in love with this True Beauty stamp set. Peacocks? Yes please! I LOVE them! I love blues and greens together, and I have seen plenty a real-live peacock while vacationing in Hawaii. They are so beautiful. So, when I saw this stamp set, it zoomed immediately to the top of my wish list! Here is the card I made.

I wanted some contrast to my card, and some drama to the coloring. So, I took a leap and did something I have never done before ... I stamped onto dark cardstock (Black!) and COLORED it with pencils! Who knew that it was this easy and dramatic and fun!?! I always thought coloring over dark cardstock would involve laying down a base color, like paint primer, and then coloring OVER all of this ... Nope! All I had to do was color with pencils right over the black, and it worked out GREAT! All the colors pop and completely cover the cardstock. I highly encourage you to try this. Here is what my peacock looked like after coloring.

I stamped the image with black ink onto black cardstock. It was a little bit difficult to see some of the intricate design parts, but it was still possible to color the image. Here is a close up of the peacock's tail, and the colors I used for the tail. Once I had the whole image colored, I stamped over it again with Versamark Black Ink, which re-darkened the black lines (the pencil coloring muted the lines somewhat), and then sprinkled on Clear Detail embossing powder and heat set it. This made the black lines of the image POP and SHINE. So much nicer to do this step because it really finishes off the image.

Once I finished coloring the image and heat embossing it, I die cut it with an oval die and layered it over the background (see next image and explanation below). Then, I squeezed on a bead of Dimensional Glue all around the oval die and sprinkled on Pine Grove Tinsel glitter. This was the perfect color and size of glitter for this image. I love the green fringe surrounding the peacock image.

I did the "Kiss Technique" for the background. I adhered a piece of Super Adhesive Sheets onto cardstock. Then, I laid down a vine background die onto the adhesive covered cardstock (which still had the release paper on top of the adhesive). I ran it through my die cutting machine. The die cuts through the release paper, and "bites" into the adhesive, but doesn't completely cut through the actual cardstock so it stays intact. Then, I pulled off the release paper for the negative part of the image, and sprinkled on Priceless Peacock glitter and burnished it in. Then, I pulled off the rest of the release paper, which is the positive part of the image, and sprinkled on Elegant Emerald glitter. The vine image can be seen, but because of the peacock glitter there isn't a lot of contrast. This is what I was going for - a subtle, textured, and color coordinated background. The vine image can be seen, but it blends in well with the background, while also tying into the Pine Grove Tinsel glitter framing the peacock.

For the sentiment, I treated my cardstock with my Anti Static Bag. Then, I stamped one of the sentiments from the True Beauty stamp set with Versamark Ink. I sprinkled on Peacock embossing powder, and heat set it. This embossing powder is SO AMAZING! Check out these colors! The way they blend together, yet still yet combine shades of blues and greens ... swoon! I LOOOOVE this embossing powder! After heat embossing, I die cut my sentiment with a label die and mounted it onto foam to add dimension to my card.

Here is another image of this card. I wholeheartedly recommend stamping onto dark cardstock and coloring your image with pencils. This was my first attempt at this, and it will certainly not be my last! It works out so well, and the colors are incredibly vivid.

This card makes me really happy and I hope you give this technique a try. I know you will enjoy the results. This True Beauty stamp set is absolutely incredible, and I know you will love it too!

I am the LAST STOP on the blog hop ... If you didn't start at the first stop, head straight to  Jess's blog so you can keep hoppin'!

Thanks for stopping by. Have a magical day!

-Chris

Sparkle N Sprinkle compensated links are used when possible.

Friday, April 28, 2017

Cat's Pajamas Embossed Stencil Layers Card for Mom (#17/52) {04.28.2017}

Here is my latest and greatest card for Mom. This one was REALLY FUN because I learned some new techniques and made this card in an AMAZING class ... Let me just tell ya! I took a class at my local Mom & Pop papercrafting store, Stampadoodle. Lynell Harlow from Dreamweaver Stencils came to our small little town and put on some classes at our local store. The classes were FABULOUS! She is such a great instructor and has designed some incredible products. In this class, we used metal stencils to do dry embossing and then more stencils to layer and color. Here is the card.

I learned a new technique, called "strié" (pronounced almost like "Stree-yay"). Wikipedia says: The word strié can be used to describe this process of painting, or to describe the actual finish created. In this case, which is hard to see in these photos, we created a linen fabric effect. To do this, we used 3/4" stencil brushes, and loaded them up with some reinker ink. Then, we lightly swept the ink on the stencil brush across the card panel. We did this from the top of the card to about halfway down the card. Go along the entire card edge, then turn the card 90 degree, and do it again, until you have done this along all four edges. This creates a cross-hatch type effect that looks like linen fabric. It is really cool in person!

To make this card, we dry embossed the card panel with a metal stencil. We ran the card panels and stencils through a die cutting machine with a beige embossing mat. Then, we striéd the card panels, and then layered on the stencil we used for dry embossing, and stenciled ink into the spaces. Then, we layered another stencil over and did it again ... this gave dimension and depth. I matted the layers with black and put the card panel on a black cardstock card base. I also stamped out a sentiment and attached it with dimensional foam tape. Then, my card was done.

I hope my Mom likes this. I loved this class and learning these new techniques by the wonderful, patient, and creative Lynell, from Dreamweaver stencils. Thanks Stampadoodle for the great class!

Thanks for stopping by. Have a magical day!

-Chris

Sparkle N Sprinkle compensated links are used when possible.

Wednesday, April 26, 2017

Sparkle N Sprinkle Corner Garden {04.26.2017}

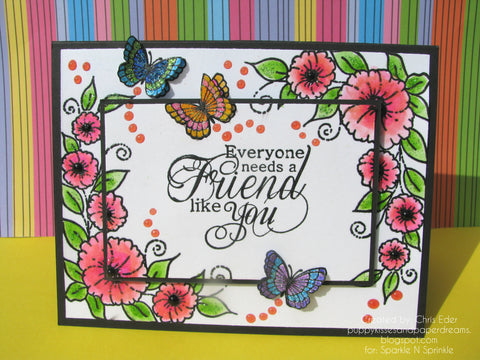
Hello! Designer Chris reporting in, with my latest Sparkle N Sprinkle creation using the Corner Garden Stamp Set! Wow, do I LOVE this stamp set! Let's check out what I made with it. 

To create my card, I cut two rectangles of cardstock, with one smaller than the other, and treated them by dusting them with my Anti Static Bag. I layered the two pieces of cardstock together, and stamped the image and sentiment with black pigment ink, sprinkled on Clear Detail embossing powder, and heat set it. I did the same with the sentiment. This is what this first step looked like. 

This sentiment is nice and bold. So awesome! This is what it looked like, after I heat set the Clear Detail embossing powder over the black ink. Gorgeous! 

Once I had the image stamped across both pieces of cardstock, I framed each cardstock piece with black cardstock, and when I put the card together, I raised the smaller piece of cardstock with foam squares to add dimension. This is a shot that shows how much dimension I ended up with, along with the raised butterflies that I colored and glittered ... more to come on these sweet butterflies below. 

Here is one of the butterflies. I colored the butterflies, and then fussy cut them. I used Brushable Glue and painted on glue where I wanted to add glitter. I brushed on glue to this butterfly, and sprinkled on Mimosa Sparkle N Soft over the orange parts of the butterfly. Once that was dry, I used the Nuvo Glue Pen Small Tip to add in more glue and sprinkled on Sparkling Snow glitter to the pink part of the butterfly. I also squeezed on Crystal Drops Jewel Drops in Strawberry Coulis for the butterfly "trail." 

I tried something new with this card too ... I PAINTED the flowers with the Crystal Drops Jewel Drops in Strawberry Coulis. This worked out really well! I also added some extra sparkle and bling to the other butterflies too. For the purple butterfly, I used the Nuvo Glue Pen Small Tip and sprinkled on both Orchid and Hyacinth glitters. For the blue butterfly, I used OceanMisty Isles, and Blue Lightning glitters. 

I finished the flowers with brushing on Ebony Black Crystal Drops and I painted the leaves with Sunlit Meadow Crystal Drops. 

This stamp set is absolutely glorious, and I love the flowers and butterflies on it. I had so much fun making this card and it really makes me happy! I hope you enjoy using this stamp set as much as I do. 

Thanks for stopping by. Have a magical day! 

-Chris 

Sparkle N Sprinkle compensated links are used when possible.

Friday, April 21, 2017

Hello Card for Mom (#16/52) {04.21.2017}

Howdy! This week's card for Mom is a smooshed emboss resist card :) As much fun to say as it is to do! I started out by stamping a background stamp with Versamark Ink onto colored cardstock, and sprinkling on Sparkle N Sprinkle's Sparkle embossing powder and heat setting it. Then, I smooshed some distress inks onto onto my craft mat, and spritzed with a few squirts of a mister. After wetting the ink, I dredged my embossed cardstock through the wet inks. Here is the card:

I wanted the image to not quite take center stage, and using the Sparkle embossing powder worked great! It gave the image some pizzazz and shine, while not really allowing the image to be perfectly seen. If I had used white embossing powder, it would have stood out really well. I wanted something softer, and this worked great! I die cut two outline style roses, and adhered them over the image on the card panel. I also used Sparkle N Sprinkle's White Detail embossing powder for the sentiment.Here is a close up of the sentiment, and a little better shot of some of the background with the Sparkle embossing powder, and some of the die cut leaves.

And, of course, I did up the inside! I used the same image inside the card. I stamped it in light pink ink onto colored cardstock. I then stamped the sentiment in Versamark Ink, sprinkled on more White Detail embossing powder and heat set it.

This was a fun card to make. I hope my Mom enjoys this sweet, simple, soft, ethereal Hello card.

Thanks for stopping by. Have a magical day!

-Chris

Sparkle N Sprinkle compensated links are used when possible.

Friday, April 14, 2017

Pansies Card for Mom (#15/52) {04.14.2017}

Howdy! Here is another card for Mommy. This one is using Sparkle N Sprinkle's fun and gorgeous Pansies stamp set. This stamp set was a recent release from Sparkle N Sprinkle.
The pansies image is perfect! I stamped out the image on a card panel and colored it. Then, I fussy cut around the image and trimmed the edges of the panel to make it a tad smaller than my card base. Here is the card.

I stamped out one of the sentiments with Versamark Ink, and sprinkled on Sparkle N Sprinkle's Fabulous Grape embossing powder. Then, I die cut the sentiment with a label die, and then blended some distress ink over the sentiment while it was still in the label die (that is how I got the crisp white edge!).

I also laid down Sparkle N Sprinkle's 1/8" and 1/4" Tear-ific Tape, and pulled off the release paper. I sprinkled on Hyacinth Glitter and burnished it in. Then, I layered the sentiment label over the purple glitter strips. I also decorated my envelope. I stamped the pansies image in light purple ink along the edge of the envelope and across the flap on the back. I also layered my stamped image over a piece of cardstock that I dry embossed with a "deep" embossing folder. These types of folders give much more dimension to the embossed image. It is kinda hard to see in these photos, but it is a weave pattern and oh so cool!

And, to finish off the card, I cut some light purple patterned paper inside the card, and also repeated the pansies image, stamped in light purple ink as well.

I think my Mommy will like this card. She likes pansies, and this card was so pretty, and has such a sweet sentiment.

Thanks for stopping by. Have a magical day!

-Chris

Sparkle N Sprinkle compensated links are used when possible.