Hello from Designer Chris! Today's card is a digital card shadow box, using one of Sparkle N Sprinkle's latest July release stamp sets! This set is the Vintage Country Home and you couldn't get any more awesome than this set! Let's check out the shadow box card I created.

I started out by sizing this image from the Vintage Country Home stamp set on my computer, using Word. I used a pre-colored image to make it quick and easy! I printed it and then started die cutting and glittering! I die cut out the image using the Tonic Swirling Frame Layering Die Set and then rolled on some Nuvo Smooth Precision Glue Pen to strategic places, and sprinkled on glitter. I used Waterfall glitter for the clouds, Waterscape glitter for the windows, Easy Green for the trees and grass, and 24 KT Gold for the door and window frames. Here is a close up of the Vintage Country Home all sparkled up!

I also glittered up the outer edge. I laid a strip of 3/4" Tear-ific Tape to the backside of the image's die cut edge. I burnished in Hickory glitter, which adhered to the Tear-ific Tape which was exposed through the negative spaces of the die cut swirl edges. Here is a close up of awesome Hickory glitter!

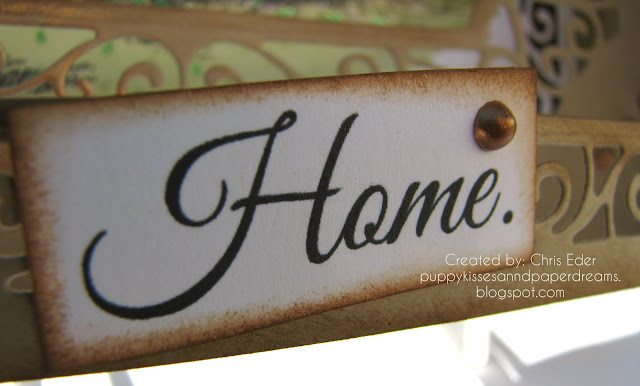
I printed out the sentiment, and cut each letter individually. I blended some ink to the outer edges of each word in the sentiment. I adhered the sentiment to the front of the shadow box, and dropped on some Nuvo Copper Penny Crystal Drops to the sentiment words too. I also added Nuvo Copper Penny Crystal Drops on the back and middle layers of the shadow box, and "smeared" some of the drops as well with my finger tool to give the card a little more distressed look. I also finished up the shadow box. I die cut two larger swirling frame dies, and then scored the edges of the cardstock and stacked them all up to make a shadow box. It worked out great!
For more card tutorials, please click on my blog, Puppy Kisses and Paper Dreams.
I really like shadow boxes, and this card came together pretty quickly and easily. I love using digital images because they can be sized and manipulated in multiple ways, and these ones from Sparkle N Sprinkle come both pre-colored and not-colored so you can do what you want with them!
Thanks for stopping by. Have a magical day!
-Chris
Sparkle N Sprinkle compensated links are used when possible.

Supply List:
Sparkle N Sprinkle Vintage Country Home digi stamp [DIGI911DE]
Sparkle N Sprinkle Hickory glitter [GM2044]
Sparkle N Sprinkle 24 KT Gold glitter [GM2038]
Sparkle N Sprinkle Easy Green glitter [G1077]
Sparkle N Sprinkle Waterfall glitter [G1071]
Sparkle N Sprinkle Waterscape glitter [G1108]
Sparkle N Sprinkle 1/4" Tear-ific Tape [SAT01]
Sparkle N Sprinkle 3/4" Tear-ific Tape [SAT05]
Sparkle N Sprinkle Glitter Brush [SG1400]
Nuvo Deluxe Adhesive [200N]
Nuvo Smooth Precision Glue Pen [206N]
Nuvo Copper Penny Crystal Drops [654N]
Tonic Swirling Frame Layering Die Set [1462e]
Tonic Tangerine machine [138e]
Tonic 12" Wide Base Craft Guillotine [454a]
I started out by sizing this image from the Vintage Country Home stamp set on my computer, using Word. I used a pre-colored image to make it quick and easy! I printed it and then started die cutting and glittering! I die cut out the image using the Tonic Swirling Frame Layering Die Set and then rolled on some Nuvo Smooth Precision Glue Pen to strategic places, and sprinkled on glitter. I used Waterfall glitter for the clouds, Waterscape glitter for the windows, Easy Green for the trees and grass, and 24 KT Gold for the door and window frames. Here is a close up of the Vintage Country Home all sparkled up!

I also glittered up the outer edge. I laid a strip of 3/4" Tear-ific Tape to the backside of the image's die cut edge. I burnished in Hickory glitter, which adhered to the Tear-ific Tape which was exposed through the negative spaces of the die cut swirl edges. Here is a close up of awesome Hickory glitter!

I printed out the sentiment, and cut each letter individually. I blended some ink to the outer edges of each word in the sentiment. I adhered the sentiment to the front of the shadow box, and dropped on some Nuvo Copper Penny Crystal Drops to the sentiment words too. I also added Nuvo Copper Penny Crystal Drops on the back and middle layers of the shadow box, and "smeared" some of the drops as well with my finger tool to give the card a little more distressed look. I also finished up the shadow box. I die cut two larger swirling frame dies, and then scored the edges of the cardstock and stacked them all up to make a shadow box. It worked out great!

For more card tutorials, please click on my blog, Puppy Kisses and Paper Dreams.
I really like shadow boxes, and this card came together pretty quickly and easily. I love using digital images because they can be sized and manipulated in multiple ways, and these ones from Sparkle N Sprinkle come both pre-colored and not-colored so you can do what you want with them!
Thanks for stopping by. Have a magical day!
-Chris
Sparkle N Sprinkle compensated links are used when possible.
Gorgeous creation, Chris. Love all the gorgeous glitters that you used and the shadow box really shows off the set so well.
ReplyDelete