Welcome to Sparkle N Sprinkle's Feb 1 New Reveal Blog Hop! ...
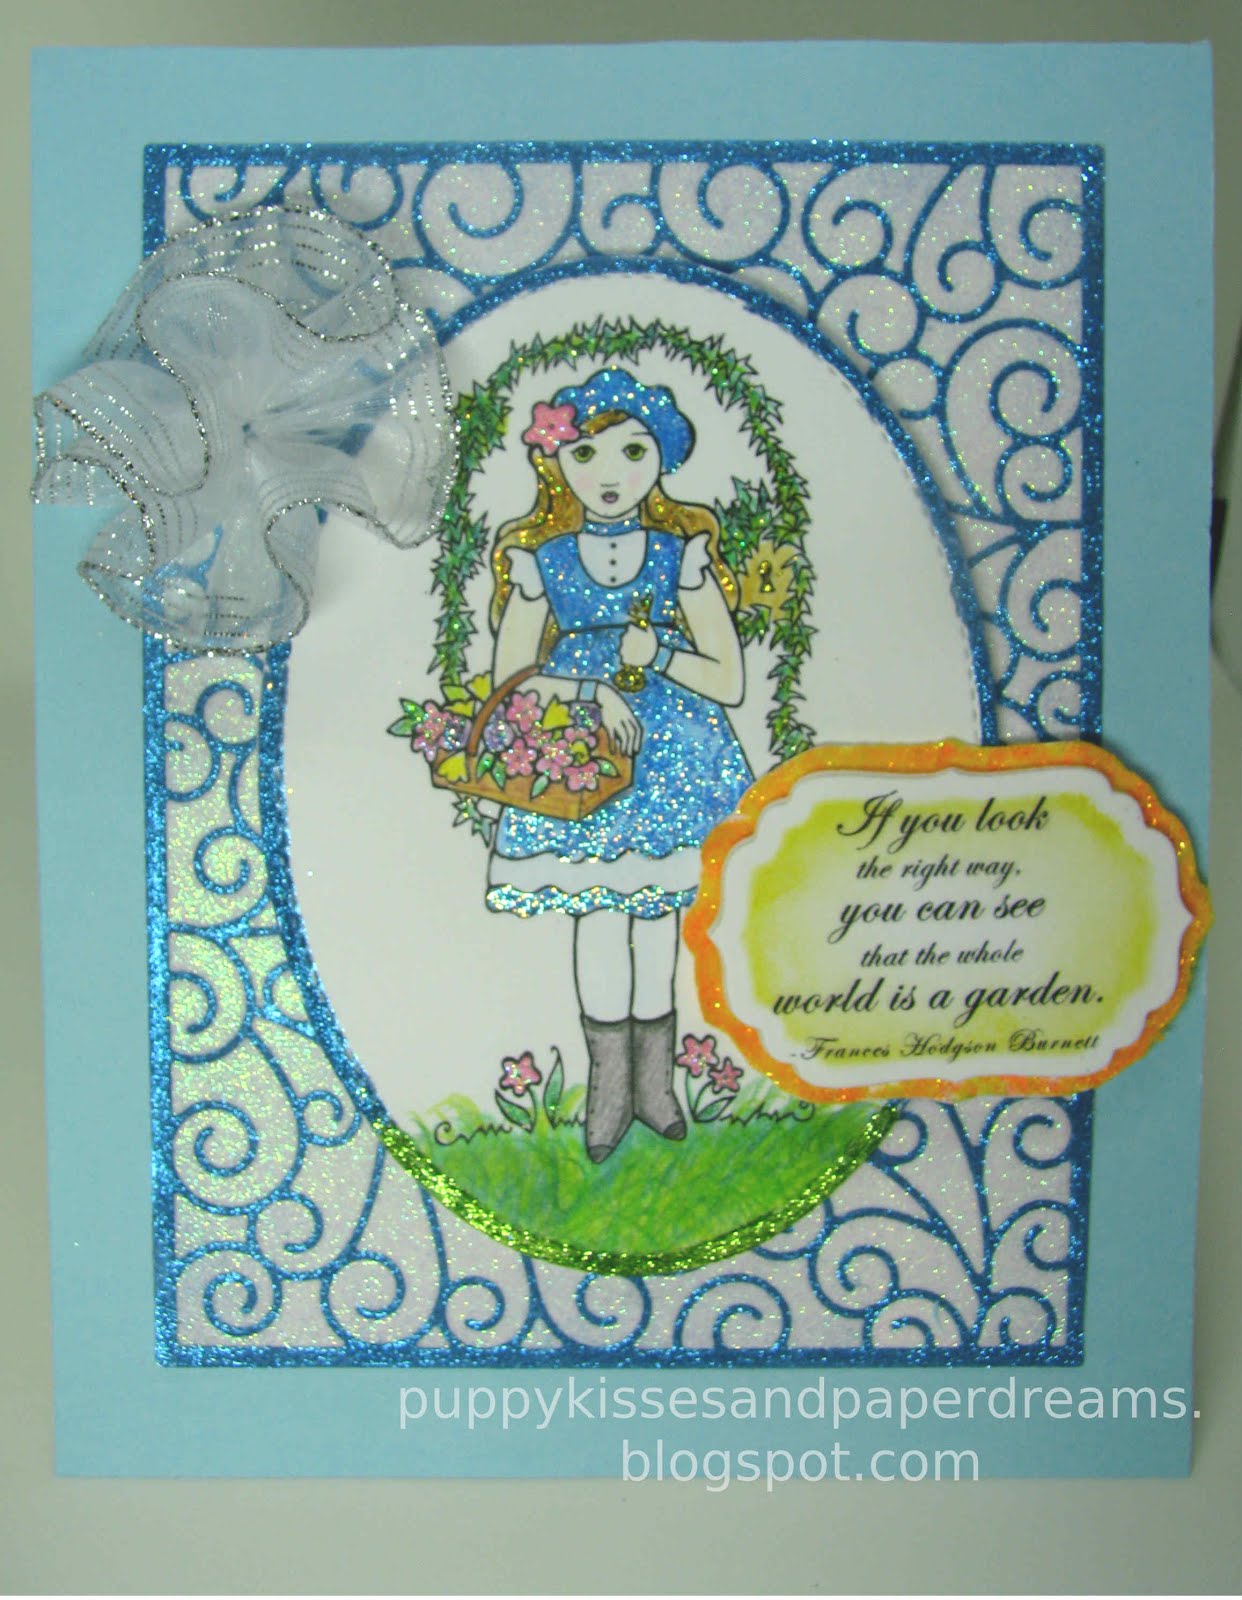
and, my first post as a permanent Sparkle N Sprinkle Designer! I am so honored to be joining this amazing team and learn from these wonderfully creative people. Sparkle N Sprinkle's glitter, embossing powders, stamps, and other products are so fabulous! I just love using all their great products.This month there are three new stamps available. I used the new Secret Garden 773 stamp set for my reveal card. Let's say hello to this sweet little garden girl:
We have THREE new stamp sets to share with you today. These new sets are 20% off until Feb 3. So once you finish the blog hop, head on over to the store and start shopping. All of the new sets are available on cling mounted rubber or as a digital image.
The sets are:

Disco Fever 772 (digi version DIGI772)
Secret Garden 773 (digi version DIGI773)
Disco Girlfriends 774 (digi version DIGI774)
On Feb 3rd, ONE GRAND PRIZE WINNER will be selected from the comments left on the Designers' blogs listed below. Please leave a comment with each Designer in order to be eligible for the Grand Prize. You never know who the Mystery Designer will be that has the winning comment.
The Grand Prize Winner, which will be announced on the SNS Facebook page and on the SNS Blog, will receive ALL of the new stamp sets released this month (or the digi versions, if preferred).
The Blog Hop order this month is:
Marie
Jess
Eret
Diane
Chris<<<<<<< This is me!
Belinda
Anne
Shona
(*Tip: if you have difficulty with a particular link, try clicking on the Designer's blog title to send you to their Home page.)
We hope you enjoy the New Reveal Blog Hop as much as we do. Thanks for joining us and remember to comment on each of the Designers' blogs to be eligible for the Grand Prize.Wonder who the Mystery Host will be this month????

The Sparkle N Sprinkle Creative Challenge also
begins today. There are lots of prizes and recognition badges. Come
check out how you can become a SNS Featured Artist as well. The theme
is always Anything Goes using Loose Glitter, Embossing Powder, and/or Flock.

Have you checked out the SNS YouTube Channel featuring Demo Donna? If not, then you are in for a real treat. Subscribe today to get all the latest Demo Donna tips and techniques!

Have you checked out the SNS YouTube Channel featuring Demo Donna? If not, then you are in for a real treat. Subscribe today to get all the latest Demo Donna tips and techniques!
This I used the digi stamp version of the Secret Garden (digi version DIGI773). I sized the girl to what would fit perfectly on my card, and printed her out on white cardstock, then colored her with pencils. After coloring, I die cut her out with an oval die. I edged the oval with two different types of glitter. To do this, I brushed on 540 Brushable Glue, and then edged the grass area along the bottom with Luau Green Velvet Glitter (microfine) [GM2004], and the rest with Jasper Blue Velvet Glitter (microfine) [GM2012].

After I finished the edging, I added a lot of glitter to the girl image. I used the Quicky Sakura Glue Pen to apply glue to specific areas. I used Bubble Gum Semi-Transparent Glitter [G1088] on the pink flower in her hair, Rapture Blue Semi-Transparent Glitter [G1078] on her hat, Evening Glow Semi-Transparent glitter [G1086] on her hair, and Easy Green Semi-Transparent Glitter [G1077] on the ivy arch. I love using semi-transparent glitters because it allows the pencil coloring to still show, while highlighting and making the colors sparkle!

I also used more glitters to add to her basket of flowers, the key, and her dress. For these, I used more Bubble Gum Semi-Transparent Glitter [G1088] for the pink flowers, Orchid Semi-Transparent Glitter [G1097], Aztec Gold Glitter [G1006] for the key, Easy Green Semi-Transparent Glitter [G1077] on the flowers, and Rapture Blue Semi-Transparent Glitter [G1078] for her dress.

I created a sentiment, and die cut it with a label die. After die cutting the label shape, I kept the die on the label, and used some distress ink and a sponge dauber to sponge some ink onto the sentiment label. After sponging and removing the die, I had a nice, clean and crisp white border around the sentiment. I also cut out a larger label and used it to frame the sentiment as well. For this larger frame, I used 540 Brushable Glue and Mimosa Sparkle N Soft [SS114] to add some gorgeous color, texture, and sparkle to the label frame. I added even more dimension by inserting some fun foam between the two layers to pop up the sentiment label.


To finish the card overall, and to ground her, I decided to do the Glitter Kiss Technique that Shona did in her blog post, and Demo Donner showcased in a recent video on Sparkle N Sprinkle's YouTube channel. I love this technique! First, I cut a piece of white cardstock to 4.25" x 5.5" and covered it with a piece of Super Adhesive Sheets [SAS02]. Then, I pulled out a swirly style die cut, and ran it through my Cuttlebug. I had just enough pressure to cut through the top of the Super Adhesive Sheet, but not so much pressure that it cut through the white cardstock underneath the adhesive sheet. I removed it from the Cuttlebug, and started peeling off the release paper from the "inner" areas of the die cut design. I ended up removing all the pieces of the background that would be my lightest color of glitter. Always start from lightest and move to darkest!. Here is a photo of how I removed each piece.

Once I had all the innerds' release paper removed, I covered the revealed adhesive with Cloud Nine Velvet Glitter (microfine) Semi-Transparent [GM2000], and burnished it in with my finger tool. On to the next step! I removed all the remaining release paper, to reveal the actual swirls, dumped on some Jasper Blue Velvet Glitter (microfine) [GM2012] and again burnished it in with my finger tool. Here is a photo of the second step:


Thanks for stopping by, have a magical day!
Chris
Wonderful card. Love her glittery dress and the background looks fabulous.
ReplyDeleteGorgeous...love all the sparkle elements you have added...fabulous!!
ReplyDeleteSuch a sparkly creation, from image to background! Just gorgeous! Wonderful job.
ReplyDeleteGorgeous! LOve all the glitter and your inlay techniques!! :)
ReplyDeleteThanks for the details on the inlaid technique. You made a stunning design and your assistance with the directions will make it a lot easier to replicate the process for me. Thank you for sharing the information, it was most helpful.
ReplyDeleteOh don't you just love that pole ribbon I hope used so much lately I love every color it's so unique nice job on the stamp card as well
ReplyDeleteA very cute card, I am loving the neon glitter and the new release.
ReplyDeleteThis is a sweet card. The pull ribbon is a great touch! I love the colors you used. Thank you for the great instructions on how you used the glitter kiss technique. You made it sound pretty easy and the outcome is beautiful!
ReplyDeleteA very pretty card! Love the way you did the swirly, glittery background and the gorgeous bow!
ReplyDeleteStunning card, great glittering and like that embellishment in the Coe!
ReplyDeleteBeautiful card Chris. Thank you for the tutorial on creating that awesome background.
ReplyDeleteReally gorgeous card, Chris. This blue and white swirly background is stunning. And so is this darling girl, who you sparkled up so beautifully.
ReplyDeleteWow! I love the background! So much glittery goodness in this beautiful card!
ReplyDeleteLoving this pretty shimmery glimmering card. I love the background and reallu enjoyed your tutorial!
ReplyDeletePretty card, love all the glitter and choice of colors. So bright and cheerful.
ReplyDelete