Friday, July 28, 2017

Hello Splatter Watercolor Card for Mom (#30/52) {07.28.2017}

Hi! Today's card for Mom is a water-color background with splatters ... and um (cough, cough) I got a little carried away with the splattering since I accidentally spilled the whole bottle of Distress Paint onto my card! So, I embraced it, and added a LOT of splatter! Let's check it out.

I was inspired by Kristina Werner's card on her blog. She created a watercolor background then added some (light) splatters. Thus, I tried to replicate this idea using some twinkling H20s watercolor paints, and white Distress Paint. I used BRIGHT colors (teal, green, purple) for the background, then started splattering, and ended up accidentally dumping about 3/4s of the bottle onto my background, my craft mat, and everything else on my work surface ... I decided to embrace it and flicked a LOT of white paint onto my background (all the paint that had landed on my acrylic block). After it dried, I die cut the background with a Lawn Fawn Stitched Rectangle die, and adhered it to my card panel. Then, I die cut four "hello" word dies and layered them together with wet glue and adhered the sentiment to the front of the card.

I also created an insert panel for the inside of the card. I die cut another square die cut panel, and then also cut out a honu (hawaiian sea turtle) die. I also used the same die to cut another honu from a left over piece of the watercolor background, and some blue sparkle paper. I layered this all up, and viola, had a fun inside!

I hope Mom likes this card - I was inspired by Kristina's card, and I really like my background too. It was lots of fun making this card, even with the massive spill!

Thanks for stopping by. Have a magical day!

-Chris

Sparkle N Sprinkle compensated links are used when possible.

Wednesday, July 26, 2017

Sparkle N Sprinkle Winter Flamingos Pink Christmas card {07.26.2017}

Pink? Christmas? Yes please! Here is another card using Sparkle N Sprinkle's Winter Flamingos Set #2 from their July reveal. I am bringing you a LOT of PINK! I am definitely dreaming of a PINK Christmas! Let's check out the card. 
Winter Flamingos Set #2
The first thing I did was create a bit of a background. I stamped out one of the flamingos from the Winter Flamingos Set #2, using Versamark Ink on the outer edges of the card panel, after treating my cardstock with the Anti Static Bag. I sprinkled on White Detail embossing powder and heat set it. This put a little bit of texture and flamingo shape along the edges of this layer. It is hard to tell, but here is a close up of the cardstock panel layers. 
Winter Flamingos Set #2
And, it can't be a pink Christmas with out a fun sentiment in PINK! I treated my cardstock with the Anti Static Bag, then stamped the sentiment using Versamark Ink. I sprinkled on Dragon Fruit embossing powder (my NEW favorite!) and heat set it. This embossing powder has the most amazingly beautiful color variations of different shades of pinks and white. It is BEAUTIFUL! Once I had the sentiment heat set, I die cut the sentiment with the frame die from the Rose Garden Invite Insert Die Set. This die is really versatile and it made some really fun edging to the sentiment banner. I also blended on some pink distress ink to the edges for even more pink awesomeness!! 
Winter Flamingos Set #2
I treated more white cardstock wtih my Anti Static Bag, and stamped out the flamingo with Versamark Ink. I sprinkled on more Dragon Fruit embossing powder and heat set it. Then, I filled in the flamingo with glitter to add color: I used the Nuvo Glue Pen Small Tip to apply glitter to the flamingo's hat, scarf, and shoes. Then, I sprinkled on Mermaid glitter. I applied more glue pen to the flamingo body, and sprinkled on Pinkerbell glitter. I rolled on more adhesive to the beak, and sprinkled on Creamsicle glitter. Then, just because I was feeling frisky and felt like it, I squeezed on some White Blizzard Crystal Nuvo Drops to his eyeballs to make them dimensional and shiny! These crystal drops have a bit of a glitter effect and they made his eyes full of stars! 
Winter Flamingos Set #2
I finished off the card by squeezing some Crystal Drops in Ebony Black and Carnation Pink on the edges of the flamingo oval. I layered everything together, and this card was done. 
Winter Flamingos Set #2
I LOVE Pink, and this set was so much fun, and while all the sentiments were fun and punny, I HAD to use this sentiment because it is completely hysterical! I wish all Christmases were pink ... I would prefer that much more than a white Christmas! I hope you have fun creating your holiday cards!! 

Thanks for stopping by. Have a magical day! 

-Chris 

Sparkle N Sprinkle compensated links are used when possible.

Friday, July 21, 2017

Miss You Step Card for Mom (#29/52) {07.21.2017}

Today's card is a sweet, easy little step card for my Mommy. And, it does not have ANY stamping on it! Only die cuts! What?!? I die cut out a step card from brown cardstock, then used a retired Lawn Fawn paper pack (Sweater Weather, I think). I die cut out the hearts and other stuff from coordinating in that paper pack. Here is the card.

Here is a close up of the Miss You sentiment. I love this concept to have the die cut and a shadow die cut as well. It makes it even more fun! And, I took this photo against one of the hibiscus flowers blooming in my hibiscus hedge!!

Here is another close up of one of the heart sections I did. I layered the three sizes of the heart together for the largest heart, and layered the other sizes too. I did a little ink blending on the edges for more oomph!

My Mommy visited recently, and after she left to return home (2,500 miles away...), I missed her so much. I of course miss seeing her every day, but it is always so sad to say goodbye when we part after a visit. I know she will like this, because this lets her know how much I miss her!

Thanks for stopping by. Have a magical day!

-Chris

Sparkle N Sprinkle compensated links are used when possible.

Thursday, July 20, 2017

Winter Snow Much Thanks Tag / Cardz 4 Galz Challenge {07.20.2017}

Hi! Today's card is for Cardz 4 Galz's Challenge #52, Christmas or Winter. I made this thanks tag, with a winter theme, and wanted to share it with you to help inspire you for this challenge. Here is the tag I made.

I stamped Simon Says Stamp Frozen Fractals stamps using Versamark Ink onto white cardstock, and sprinkled on Sparkle N Sprinkle's Silver Lightning embossing powder, and heat set it. Then, I blended blue distress ink over the cardstock to give it a blue background. Here is one of the snowflakes close up!

Here is another close up of another one of the awesome frozen fractal snowflakes! I love this stamp set :)

And again, the full tag. After I stamped the snow flakes, I stamped the sentiment from the same stamp set and heat embossed it with the same embossing powder. I adhered some snow flake sequins in strategic places, and this tag was done. It is the perfect tag to say thank you during the winter season or for Christmas.

I really like this tag, I love this stamp set, and this tag was a LOT of fun to make. I might have to mass produce some more, because this was so much fun :) I can't wait to see what you all make and post at Cardz 4 Galz's Challenge #52.

Thanks for stopping by. Have a magical day!

-Chris

Sparkle N Sprinkle compensated links are used when possible.

Wednesday, July 19, 2017

Sparkle N Sprinkle Winter Greetings Bird and Wreath card {07.19.2017}

Hello! I am reporting in with another Sparkle N Sprinkle July Reveal stamp set. I LOVE this one. The stamp set I used for today's card is the Winter Greetings Bird and Wreath set. I used the digital set, which is so easy to use, and comes with the images uncolored, and also colored. In this case, I used the pre-colored images, one of which was the wreath with some pink background and pink berries. Since green and pink are my favorite colors, I used this one. Let's check out my card. 
Winter Greetings Bird and Wreath
I sized the digital images I wanted, using my computer. I wanted the wreath to have the "holiday wishes" sentiment banner stretching the base of the wreath, with two little birds holding the banner. The stamp set has this sweet white bird with a hint of pink cheeks. I sized the bird to what I wanted, then copied and pasted it, then flipped it to make a mirror image of the original bird. This way I was able to have the two birds pointing towards the banner. This is another GREAT reason to use digital stamps! I die cut the wreath with a circle die, and die cut out the center too. I also die cut a scalloped circle to frame the wreath, in pink paper. I fussy cut the banner and birdies. I layered these together, but realized I wanted to make a card base for the wreath, so I cut a square panel base from black cardstock. But, wait, there needed to be MORE! I wanted some bling and sparkle, and whipped out my trusty "Tear-ific" Tapes. I adhered alternating strips of 1/8" "Tear-ific" Tape and 1/4" "Tear-ific" Tape on the card base. I peeled off the release paper, and sprinkled on Black Ice glitter, and burnished it in. So pretty! Once I had this done, I layered the wreath over the black card panel and matted it with pink cardstock base.  
Winter Greetings Bird and Wreath
Then, I started adding sparkle to my image! I used the Nuvo Deluxe Adhesive to squeeze on adhesive to the berries. I sprinkled on Ballerina glitter to the berries, which made them sparkle! And, I used the Nuvo Glue Pen Small Tip adhesive for the holly leaves. I sprinkled on Easy Green glitter for the holly leaves. I added more adhesive to the pine boughs, and sprinkled on Elegant Emerald glitter to those. This gave the wreath a bit more of a sparkle and shine, which make it so much fun! It is gorgeous in real life! 
Winter Greetings Bird and Wreath
For the sentiment, I applied the Nuvo Glue Pen Small Tip adhesive to the downstrokes (wider strokes) of the sentiment. I sprinkled on more of the Ballerina glitter to add some extra sparkle and dimension. You can see the sentiment close up here. 
Winter Greetings Bird and Wreath
And, I had to add a sweet spot of sparkle to the birdies. I rolled on more Nuvo Glue Pen Small Tip to the birdies' cheeks, and sprinkled on the Ballerina glitter here too. This gave the birdies just a hint of pink cheek sweetness! 
Winter Greetings Bird and Wreath
I can't believe it is ALREADY July, which means the winter holidays are on their way ... I will have to keep making more holiday cards :) 

Thanks for stopping by. Have a magical day! 

-Chris 

Sparkle N Sprinkle compensated links are used when possible.

Monday, July 17, 2017

Pig In a Barn!! card {07.17.2017}

Okay, okay, okay, this card makes me SQUEAL!!!

I have a friend who loves pigs, and I made this card for her as a thank you. I cobbled together some white cardstock panels to create the barn base (from a pinterest photo), and cut red cardstock panels to make it look like a barn! I used a "front and back" pig stamp (I think from Art Impressions or something, but I can't remember, and don't have it near me to confirm). I colored the piggy with Copic markers. I also stamped out some farm critters from Lawn Fawn's Critters on the Farm, and colored them, for the inside of the barn. Here is what the card looked like open.

I know my friend really loved this card, because I have seen it on her desk when I have walked by her office :) So glad I could make her day!

Thanks for stopping by. Have a magical day!

-Chris

Sparkle N Sprinkle compensated links are used when possible.

Friday, July 14, 2017

Sparkle N Sprinkle July 2017 Reveal {07.15.2017}


Welcome to the Sparkle N Sprinkle
 Christmas In July ðŸŽ„🎅🤶 New Reveal Blog Hop!


We have six new Christmas themed rubber stamp sets plus two huge digi bundles being revealed this month. 

The sets are:


 Winter Greetings Birds and Wreath 855
(Digital Version DIGI855FS

Elf Peeker 858
(Digital Version DIGI858BG)


Winter Flamingos Set 1 860
  (Digital Version DIGI860SG)

Winter Flamingos Set 2 861
(Digital Version DIGI861SG)

Spirit of Christmas Poinsettia 862
(Digital Version DIGI862B - huge digi bundle)

Crystal Snowflakes 868
(Digital Version DIGI868FS)

DIGI4005FS - Winter Greetings digi papers


When you purchase the digi versions of any of the SNS rubber sets, you are getting lots of extras that aren't available otherwise.  These extras include additional images not available with the rubber version, digi papers (in some cases), and now a cut file to use with your electronic cutting machines will also be included with all digi images purchased!

You're definitely going to want both the rubber versions as well as the digi versions of all our new releases.

The new sets are 20% off until July 20, 2017.  So once you finish the blog hop, head on over to the New Store and start shopping.

On July 18th, ONE GRAND PRIZE WINNER will be selected from the comments left on the Designers' blogs listed below. Please leave a comment with each Designer in order to be eligible for the Grand Prize.  You never know who the Mystery Designer will be that has the winning comment.

The Grand Prize Winner, which will be announced on the SNS Facebook page and the SNS Blog, will receive ALL of the new rubber stamp sets revealed this month.


The Blog Hop Order this month is:

Eret
Donna
Belinda
Anne
Chris ... YOU are HERE!
Shona
Jess
Diane


(*Tip: if you have difficulty with a particular link, try clicking on the Designer's blog title to send you to their Home page.)


We hope you enjoy the New Reveal Blog Hop as much as we do.  Thanks for joining us and remember to comment on each of the Designers' blogs to be eligible for the Grand Prize.  

 Wonder who the Mystery Host will be this month????


Have you checked out the SNS YouTube Channel featuring Demo Donna?  If not, then you are in for a real treat.  Subscribe today to get all the latest Demo Donna tips and techniques!


We are very happy to announce the new and improved SNS Creative Challenge is now being held on Facebook. 

 Head on over to the Sparkle N Sprinkle Creative Challenge group and ask to join today.  This is a closed group, but we want anyone who wants to participate to join (just trying to keep out spammers 😀).  You can join today!

 The new challenge began July 1 and will run from the 1st - 25th of each month.  Be sure to read the Challenge Rules before adding a photo.  A SNS image (either rubber or digi) needs to be used.  If you don't have any yet, no worries, there are some Freebies located on the new website.  They are located on the Home page, just scroll down a bit to see them:

The Winner and Top Three will be posted on the last day of each month.  The Winner will receive a $15 Gift Certificate to the new on-line store.  Please review all the Challenge Rules before submitting your photo.

We hope to see you soon in our new Facebook Group!


And NOW, let's check out my July 2017 Reveal "Christmas in July" project

I fell in love with the Crystal Snowflakes stamp set. I created the card panel, and stamped one of the snowflakes in blue ink. Then, I blended some light blue distress ink along the edges to tone down the white cardstock. I stamped the larger snowflake in blue ink, and slightly offset it using a stamp positioner, and stamped it again with Versamark Ink. Then, I sprinkled on Sapphire embossing powder, and heat set it. I matted the panel with black cardstock, and adhered it to a white cardstock base.

I also added in some Crystal Drops to parts of the embossed large snowflake. I squeezed on Caribbean Ocean and White Blizzard drops, which really made the snowflake even more fun!

I love using Tear-ific Tape to make glitter strips, and this card was perfect for it. I laid down a strip of 1/8" Tear-ific Tape towards the bottom of the card. I then laid down a strip of 1/4" Tear-ific Tape above it, and another below it. I pulled away the release paper on the 1/8" Tear-ific Tape, and sprinkled on Mermaid glitter, and burnished it in. Then, I removed the release tape from the 1/4" Tear-ific Tape and sprinkled on Waterfall glitter, and burnished it in as well. These two work so well together! I love these glitters!!

I stamped out one of the sentiments, using Versamark Ink, and then sprinkled on Sapphire embossing powder, and heat set it. I die cut the sentiment with an oval die, and matted it with black cardstock. Then, I squeezed on little drops of White Blizzard Crystal Drops all around the edge. This looks like little rivets in real life and is really cool!

I squeezed a few little dots of Crystal Drops on the edges of the card, and this card was done. It was fun to make, and I love all the colors. I know you will love this stamp set too!

Our next stop on our July 2017 Reveal Blog Hop is Shona. She ALWAYS makes the most beautiful cards, I know you will love what she has in store for you!

Thanks for stopping by. Have a magical day!

-Chris

Sparkle N Sprinkle compensated links are used when possible.

Happy Day Flower Card for Mom (#28/52) {07.14.2017}

Today's card for Mom is a sweet little "happy day" card. Let's peek at it, shall we?!?

I die cut a card panel, using Lawn Fawn's Stitched Journaling Card die. This made a perfect little 3x4 panel. I stamped a scripty background stamp in silver pigment ink across the panel just to add some texture and background. I used Hero Arts Color Layering Hibiscus stamp, stamped out some flowers and leaves onto the card panel using several ink colors. I love how the silver script shows through.

For the sentiment, I die cut a "happy" from Alt E New's Happy die using glitter paper. I stamped out the "day" from a Lawn Fawn stamp set, but can't remember which one... I layered the card panel over a green glittery cardstock base, and this card was ready to send to Mom.

And, shhhh, don't tell ... my Mom was visiting recently, and I took this photo of her, as she was inspecting my blueberry plants and one of my hummingbird feeders on the side of my house. I know it isn't a flattering photo, or showcasing her "best" side ... but I wanted to sneak this photo into this post! :) Yes, I know, I am a BAD daughter!

I think Mom will like this card - she likes flowers, and she loves Hawaii, and how can we go wrong with a bright and pretty hibiscus flower card!

Thanks for stopping by. Have a magical day!

-Chris

Sparkle N Sprinkle compensated links are used when possible.

Wednesday, July 12, 2017

Masculine Nautical Birthday Card {07.12.2017}

I made today's card for a co-worker who likes to sail. This is what I came up with. Let's check it out.

I used several patterned papers, and die cut the sails and boat. I stamped the "Happy Birthday" sentiment from Lawn Fawn's Bake Me a Cake stamp set. I also added a LOT of texture for the water and sandy beach using seed beads and shells. This photo shows all the texture and the sentiment banner.

Here are the waves I made with paper. I inked and curled paper to make waves, and layered them all together. I also used some twine, acting as rope, to frame the oval image and waves. This photo helps showcase these embellishments.

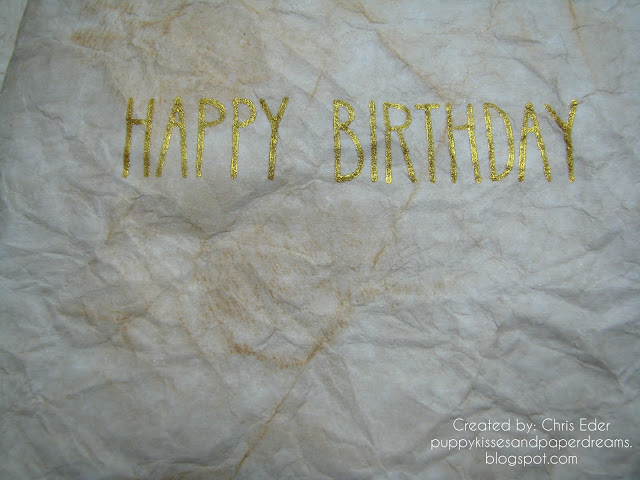
I wanted to create an old-fashioned, vintage feel. I crumbled up some paper, to use as the insert into the card base, and then inked up the crinkles using distress ink. After this was all done, I stamped the happy birthday sentiment with gold pigment ink, using another Lawn Fawn stamp set.

This card was pretty different for me ... I struggle with masculine cards. But, this one was fun to make and I think our co-worker enjoyed it.

Thanks for stopping by. Have a magical day!

-Chris

Sparkle N Sprinkle compensated links are used when possible.

Monday, July 10, 2017

Diamond Anniversary Card {07.10.2017}

Hello! Today's card is a card I made, requested by my Mommy, for her good friends who are celebrating their 60th wedding anniversary. Mom said that she is the only surviving member of the wedding party, and Judy, her friend, is a very dear, life-long friend. Mom and her grew up together and are almost like sisters. I did some googling, and found that the 60th wedding anniversary is the Diamond anniversary. So, I went with a silver and black theme with some silver sparkles to have that Diamond feel! Let's check out the card.

I used a gatefold black card base. I die cut some black/silver patterned paper (with diamond shapes on it!) and matted them with silver cardstock. I also die cut some smaller rectangles in silver, and used them for my sentiment panels. I used Lawn Fawn's Happy Happy Happy stamp set. I stamped out the "Happy" on black cardstock, using Versamark Ink, and sprinkled on Sparkle N Sprinkle's Silver Lightning embossing powder and heat set it. Then, I die cut it with the matching die. I also did the same with the "60" using Lawn Fawn's Quinn's 123s and die cut them with the matching dies as well. I used Lawn Fawn's Harold's ABCs to stamp the "th" with black ink. I stamped the "anniversary" with black ink and sprinkled on more of Sparkle N Sprinkle's Silver Lightning embossing powder and heat set it.

I repeated the same concept on the other silver panel, using Lawn Fawn's Violet ABCs and Sparkle N Sprinkle's Silver Lightning embossing powder, and then I heat set it. I layered these panels over the patterned paper.

IFor the inside of the card, I kept it simple, but added in some flourishes. I created a panel to insert into the card with silver cardstock. I die cut out two flourishes with some dies in my stash, and die cut the same flourishes with the diamond black/silver patterned paper I used on the front. I inlaid the black/silver patterned paper into the silver card panel. And, to keep from wasting some perfectly good silver flourishy die cuts, I adhered them to the front of the card as well.

This card was fun to make, and I see "diamonds" in it, although it is black and I hope the recipients understand what I was going for, and not think it is like an "over the hill" type card, which is NOT what I was going for! I hope you enjoyed it too!

Thanks for stopping by. Have a magical day!

-Chris

Sparkle N Sprinkle compensated links are used when possible.

Friday, July 7, 2017

Vintage(ish) Post Card for Mom (#27/52) {07.07.2017}

Sometimes ya just gotta try something new and/or simple ... this was one of those cards! I have had this Hero Arts Carte Postal (sadly, retired) stamp set for quite a while, and was finally inspired to whip it out and use it. I stamped out almost all the stamps from this set, with brown ink, into kraft cardstock. Then, I blended some vintage photo distress ink to the edges and around the card a bit to give it some added age.

I wanted a bit of shine, so I whipped out my new Sparkle N Sprinkle Nuvo Glitter Markers, in the Midnight Shadows collection. This collection has three pens: an aqua blue, a darker blue, and a silver. I used the silver glitter pen, and dotted and "globbed" some silver glitter pen in areas onto the card. Here is a close up of the silver splotches.

I don't make a lot of one-layer cards, but this one came together fast, I used a stamp set that I have been wanting to use for a long time, and I like the vintage and simple look of it. I think Mom will like it because she likes to travel and get mail, and this stamp set and card combines both!

Thanks for stopping by. Have a magical day!

-Chris

Sparkle N Sprinkle compensated links are used when possible.

Thursday, July 6, 2017

Rainbow Inlaid Butterflies card {07.06.2017}

What a wonderful day! I am posting another card I made, for the current Cardz 4 Galz Challenge #51: Butterflies. Let's check it out!

I purchased the Floating Butterfly Frame die cut from Memory Box a while ago and have never used it ... until today! I thought it would be fun to make inlaid colorful butterflies ... and it was, but it took a while to piece each butterfly color back into the black frame, but I'll get to that in a second. First, I die cut out the Floating Butterfly Frame using white cardstock. I cut it again with black cardstock. These were my bases. Then, I cut smaller pieces of colored cardstock, figured out where I wanted to place them (in clockwise rainbow order) and taped them to the back of the die cut so they would remain in place. Once I got all the colored cardstock strategically placed, I die cut the frame again, and ended up with all these little pieces of colored cardstock for each butterfly. I also wanted to have something fun in the background, so I spritzed my white die cut cardstock with four colors of misting spray (red, orange, yellow, blue) and spritzed them strategically to also follow the clockwise rainbow pattern. Then, I began piecing everything together! This took longer than I anticipated ... but it was easy to do. Here is a close up of the spritzing and the colored cardstocks.
Here is an EXTREME close up of two of the inlaid butterflies. You can see the spritz really well too.

And, to finish off my card, I stamped a sentiment from Taylored Expressions's Wonderful World stamp set, onto a strip of black cardstock, in Versamark Ink and sprinkled on Sparkle N Sprinkle's White Detail embossing powder and heat set it. Then, I layered it onto the butterfly card with foam tape, and my card was done!

Even though this was a little tedious to inlay all the colored cardstock pieces, I love how this turned out, and I would do it again in a second! I hope you have fun with butterflies for this challenge! I can't wait to see what you will make! Check out the challenge at Cardz 4 Galz.

Thanks for stopping by. Have a magical day!

-Chris

Sparkle N Sprinkle compensated links are used when possible.