Friday, June 30, 2017

Layered Flowers for Mom (#26/52) {06.30.2017}

Howdy! Here I am, with another card for my Momma. This one was using a new stamp set that Sparkle N Sprinkle carries in their online store. This is a layering stamp set from Hampton Art. The stamp set is called Flower Happy Layering set. I This flower has three layers to it, the solid background, the detail, and the outline. I used all 3 stamps to make each flower. Let's check out the card.

I stamped one of the flowers, masked it off, then stamped the next, masked it, and stamped again ... I did this until I had four (yellow) flowers cascading across the card. I also stamped the purple flowers, which has two layers, a silhouette layer and an outline layer. I did the same for the leaves and stems with green inks. After I finished stamping, I fussy cut the card panel above the flowers, adhered it with Nuvo Deluxe Adhesive to foam, and adhered it to my card base. I also squeezed out a dot of the same adhesive to the yellow flower centers, and sprinkled on some Evening Glow glitter. I also used the Nuvo Glue Pen Fine Tip to add adhesive to the leaves and the purple flowers. For the leaves, I sprinkled on Luau Green glitter to the leaves, and I added Orchid glitter to the purple flowers. Then, to add a little bit of fun something-something, I drew in black dots with my thin-line black marker. I was inspired by a card I saw on Little Crafty Pill blog. I am a new follower of her blog, and am loving her creations!

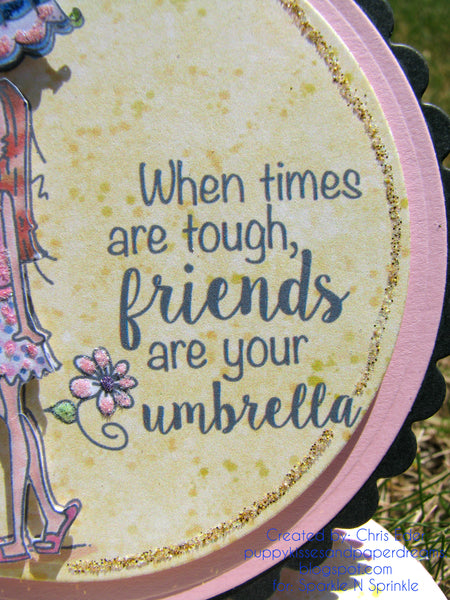
I also stamped out the sentiment with a black ink, then sprinkled on Sparkle N Sprinkle's Clear Detail embossing powder and heat set it. I fussy cut the sentiment, added some foam dimensionals behind it, and layered it across the card.

This was another fun card to make. I love layering stamps and I love flowers ... so to combine the two is pure happiness :)

Thanks for stopping by. Have a magical day!

-Chris

Sparkle N Sprinkle compensated links are used when possible.

Wednesday, June 28, 2017

Sparkle N Sprinkle Umbrella Friends (with a Surprise!) Card {06.28.2017}

Howdy! Here is another new release for June, from Sparkle N Sprinkle that I am lucky enough to share with you! I used another digital stamp for today's card. Wow! What fun this one was!! I used the digi version of the Umbrella Friends stamp set, and really loved it! Let's see what I made with it. 
Umbrella Friends
Of course, the friends and their umbrella are the star of the show. I sized and printed out the two friends, and used the pre-colored version. Again, this makes a card come together fairly quickly since I had an image ready to go! I printed several copies of the image (all sized the same!) and started fussy cutting. I fussy cut the two friends and layered them over the card panel base, over the images on the base layer. I added dimension with some foam tape. I also added some glitters with the Nuvo Glue Pen Small Tip. I sprinkled on Denim glitters on the jeans, Hyacinth glitter onto the purple shirt, and Ballerina glitter on the pink shirt and skirt. I tried to highlight the drape of the fabric with the adhesive (and glitter) instead of just covering the whole image with it. This allows the detail to still show, while adding some really fun and pretty sparkly goodness! 
Umbrella Friends
I repeated the same idea with the umbrella. I fussy cut two layers of the umbrella. One layer was the whole umbrella, and the top layer was just the flowers on top of the umbrella. Again, these had dimension thanks to some foam tape pieces! I repeated the Nuvo Glue Pen Small Tip adhesive, and added glitters. I sprinkled on Ballerina glitter to the pink part of the umbrella, Denim to the blue, and Hyacinth to the purple. I also added Evening Glow and Margarita glitters to the flowers on the umbrella. 
Umbrella Friends
I printed one of the sentiments onto the card base panel too. I highlighted the flower using the Nuvo Glue Pen Small Tip adhesive and Ballerina and Margarita glitters. This really jazzed up the sentiment area a lot! 
Umbrella Friends
And, surprise, surprise! This card is an easel card :) Here is the card fully opened. What fun! 
Umbrella Friends
To make the base of the easel card and the "stopper" to keep it opened, I printed another sentiment from the stamp set, and cut it with a smaller circle die. I framed it, as well as the front of the card, with a scalloped circle die in black cardstock. I also drew a line, inside both the front card panel and the stopper circle, with the Nuvo Glue Pen Small Tip. I sprinkled on the amazingly beautiful Celestial glitter. This really made the circles sparkle and shine! I love it! 
Umbrella Friends
This card really makes me happy. It is sweet, and I love the little surprise of having it as an easel card. I hope you check out this fun and flirty stamp! 

Thanks for stopping by. Have a magical day! 

-Chris 

Sparkle N Sprinkle compensated links are used when possible.

Friday, June 23, 2017

I Admire Your Strength Rose Buds Card for Mom (#25/52) {06.23.2017}

Hello! Today's card for Mom is using two of my new favorite Alt E New stamp sets ... Best Buds and Budding Thanks. Let's check it out!

These two stamp sets compliment one another. The Budding Thanks set is the layering set. For the rose bud, there are 5 layers, three for the rose bud itself, and two additional layers for the greenery at the base of the bud. I stamped out the roses with three shades of red inks, and the bud base in two shades of green inks. The Best Buds stamp set is the outline image for all the leaves and flowers in the Budding Thanks set. I stamped the outlines with black ink over the rose buds. Then, I squeezed on some rain drops using Sparkle N Sprinkle's Nuvo Crystal Drops in Morning Dew, which dries clear.

And, I also stamped the leaves and stems using both the Budding Thanks for the two layers of leaves and stems, and the Best Buds for the outlines for the leaves. There is also an outline for the stems, but I didn't want to use it since I wanted to stamp my sentiment in black, in the center of the card and I thought that layering the sentiment over black lines would detract a bit from the sentiment.

Finally, here is the sentiment. I stamped it in black ink over the green stems. This worked out really well because the sentiment popped out well even with the stems in the background!

I think Mom will like this card because she loves flowers. This card was fun to make and it came together pretty quickly. I love layering stamps and love how much detail the layers provide.

Thanks for stopping by. Have a magical day!

-Chris

Sparkle N Sprinkle compensated links are used when possible.

Thursday, June 22, 2017

Made With Love Sew Card {06.22.2017}

Hi! Here is another card for Cardz 4 Galz. This one is for the "Sew & Sew" Challenge #50. I used a stamp set from a friend ... and it wasn't in its original packaging, so I have no idea what this set is from. But, it was just what I wanted, it had a sewing machine, pin cushion, buttons, and some other fun sewing images. I used some patterned paper in my stash to make it look a bit like a sewing machine on a table, with some striped wallpaper in the background! Makes me think of Grandma :)

I stamped out the images on white cardstock with black copic friendly ink. I colored the images with copic markers, fussy cut them out, used a black marker to color the edges of the images, and then I layered them over the patterned paper. I also coated each image with a layer of Glossy Accents to give each image some shine! This makes the sewing machine look more like Grandma's!

This pin cushion makes me so happy! I fussy cut the pin cushion, and then stamped the pin cushion again, right where I wanted it to sit on the desk area, and then layered the fussy cut pin cushion over it. Then, I fussy cut the pin tops and layered them over the pins that were stamped directly to the patterned paper. This made it easier to layer up the pin heads and give a teeny bit of dimension.

And, I colored the buttons, fussy cut them out, adhered them to the card, then covered them with Glossy Accents for shine and depth! Such fun!

I hope you enjoy this sweet card, made with love. It was fun to make and it was nice to work with retro colors!

Thanks for stopping by. Have a magical day!

-Chris

Sparkle N Sprinkle compensated links are used when possible.

Wednesday, June 21, 2017

Sparkle N Sprinkle Baby Oh Baby Amazing Mom Card {06.21.2017}

HI! I LOVE the Sparkle N Sprinkle new stamps revealed for June! They are very versatile and so much fun! My card today is a card that can be used for a baby shower, new mom, or just for sending love and kindness to a new, expectant momma. Let's check it out, shall we? 

I used the Baby, Oh Baby digi image. I LOVE digi images! They are so easy and versatile. In this case, I used the pre-colored digi image. I really like having a choice of having the non-colored option, or the pre-colored option that you get in a digi stamp. It makes it even more versatile! In this case, I loved her yellow dress. I sized the image to fit my die cut labels shape. I also flipped the image so the new momma is looking to the right instead of the way the image was designed with her looking to the left. This is another bonus of using a digi image! So easy to switch it up and flip or change the image. I used the Nuvo Glue Pen Small Tip to roll some adhesive onto the dress. I tried to add my adhesive in a way that didn't completely cover the underlying image, but helped enhance the shape and movement of the dress fabric. I sprinkled on Daisy glitter onto her dress, which was the perfect way to highlight the yellow! It is such a gorgeous glitter!! I also used the Nuvo Glue Pen Small Tip on the rose, and sprinkled on Luau Green for the stem and leaves, and Gypsy Red for the rose itself. Here is a close up of her skirt area and the rose in her hand. 
Baby Oh Baby
I also added some additional embellishments to the flowers in her hair. I rolled on more Nuvo Glue Pen Small Tip adhesive, and sprinkled on more Gypsy Red and Luau Green glitters to highlight the flowers and match her rose. I also squeezed on some Ripened Pumpkin Crystal Drops to the center of the flowers. Here is a close up of the flowers. 
Baby Oh Baby
This stamp set has several sentiments. I sized and printed out "You'll be an amazing Mom" and die cut it with a matching labels die. I framed it with an elegant labels die. Here is the sentiment. 
Baby Oh Baby
And, lastly, I embellished the bottom of the sentiment area. I pulled out a yellow flower from my stash, glued it onto the sentiment with the new (and AWESOME!) Nuvo Deluxe Adhesive glue, and also created three little dots of the same glue to each side of the flower, and added a swoop of adhesive around the center of the flower. While the glue was still wet, I sprinkled on more Daisy glitter. The glue held its shape really well and made the cutest little dots of glittery goodness. Almost like a lemondrop! 
Baby Oh Baby
I love how sweet this card is, and I know any expectant mommy would love receiving this. I hope you enjoy it as much as I do! 

Thanks for stopping by. Have a magical day! 

-Chris 

Sparkle N Sprinkle compensated links are used when possible.

Monday, June 19, 2017

Dad's Day Cards {06.19.2017}

For Father's Day, I made "galaxy" cards for our Dads. I started out with watercolor paper cut just shy of an A2 size. I used watercolors and painted on some random blobs of paint, dried each layer with a heat tool, then swirled on some black watercolor on top of the colors. I then flicked on some white acrylic paint, and layered them behind a card panel with a die cut rectangle cut out. Then, I squeezed on some little drops of stickles for some glittery goodness or twinkling stars! Here is what the front of the cards looked like. (Sorry for the poor photo quality on this one, I don't know what happened!)

Here is a close up of one of the galaxies. About half way through creating the galaxy following the steps above, you will think it is a hot mess ... but keep going, trust me! It will work out and look incredible :)

And, here is the other galaxy. I like the "shooting star" effect from a few over zealous paint splatters! This was so much fun to make.

The inside has a little surprise ... I stamped out some of the images from Lawn Fawn's Out of This World stamp set, and die cut the images with the matching dies. I watercolored these images, and let them dry. I also stamped out a punny sentiment using Taylored Expressions' My Favorite Dad stamp set and white pigment ink. Then, once I had the sentiment stamped out, I spiral cut a circle shaped acetate piece. I adhered the center of the spiral to the inside front of the card and the end of the spiral to the inside back of the card. I adhered the astronaut to the acetate spiral and it "hovers" in mid-air like it is floating! So cool!

And here is the inside of the second card. This astronaut hovers too - the spiral was attached to the inside of the card front, and the other end was attached to the inside of the card. This really made me happy because it is so easy to do, and really makes the card interactive and fun!

I hope our Dads enjoy their cards ... I think they will

Thanks for stopping by. Have a magical day!

-Chris

Sparkle N Sprinkle compensated links are used when possible.

Friday, June 16, 2017

Mom Well Done Card (#24/52) {06.16.2017}

Sometimes ya just need to pull together a card quickly ... here is an example of that. I used some patterned paper strips (leftovers!) and a quick stamp or two, and this card was done. I stamped the sentiment from Taylored Expressions' My Favorite Mom stamp. I used Lawn Fawn's patterned paper and the little strip from the bottom of one of their 12x12 sheets of paper. Bada bing ... quick card!

I figure getting SOMETHING in the mail is better than getting NOTHING in the mail :) I know the sentiment will make Mom laugh, and that is what it is all about.

Thanks for stopping by. Have a magical day!

-Chris

Sparkle N Sprinkle compensated links are used when possible.

Wednesday, June 14, 2017

Sparkle N Sprinkle June 2017 Reveal {06.15.2017}

Welcome to the Sparkle N Sprinkle
June Reveal Blog Hop!


We are now revealing our new stamp sets on the15th of each month.  On the first of the month, a new video kit club will be revealed.

We are continuing to add new product lines, so be on the look out for them.  The newest addition is Hampton Arts.


We have four new rubber stamp sets plus one huge digi bundle being revealed this month.  

The sets are:


Umbrella Friends 851  
(Digital Version DIGI851BG - additional sentiment)

Tropical Mermaid Alana 854
  (Digital Version DIGI854LS - additional sentiments)

Swallowtail Butterflies 856
(Digital Version DIGI856FS - see below)

Baby, Oh Baby 857
(Digital Version DIGI857SG - additional sentiments)

DIGI856FS - Swallowtail Butterflies (includes lots of additional colored images, additional sentiments, and digi paper)


When you purchase the digi versions of any of the SNS rubber sets, you are getting lots of extras that aren't available otherwise.  These extras include additional images and/or sentiments not available with the rubber version, digi papers (in some cases), and a cut file to use with your electronic cutting machines will also be included with all digi images purchased!

You're definitely going to want both the rubber versions as well as the digi versions of all our new releases.

The new sets are 20% off until June 20, 2017.  So once you finish the blog hop, head on over to the New Store and start shopping.

On June 18th, ONE GRAND PRIZE WINNER will be selected from the comments left on the Designers' blogs listed below. Please leave a comment with each Designer in order to be eligible for the Grand Prize.  You never know who the Mystery Designer will be that has the winning comment.

The Grand Prize Winner, which will be announced on the SNS Facebook page and the SNS Blog, will receive ALL of the new rubber stamp sets revealed this month.


The Blog Hop Order this month is:

Shona
Diane
Donna
Chris
Jess
Anne
Belinda
Eret

(*Tip: if you have difficulty with a particular link, try clicking on the Designer's blog title to send you to their Home page.)


We hope you enjoy the New Reveal Blog Hop as much as we do.  Thanks for joining us and remember to comment on each of the Designers' blogs to be eligible for the Grand Prize.  

 Wonder who the Mystery Host will be this month????


Have you checked out the SNS YouTube Channel featuring Demo Donna?  If not, then you are in for a real treat.  Subscribe today to get all the latest Demo Donna tips and techniques!


We are also happy to announce the new and improved SNS Creative Challenge.  It will now be held on Facebook. 

 Search for the Sparkle N Sprinkle Creative Challenge group and ask to join today.  This is a closed group, but we want anyone who wants to participate to join (just trying to keep out spammers 😀).  You can join today!

 The new challenge will begin July 1 and will run from the 1st - 25th of each month.  A SNS image (either rubber or digi) needs to be used.  If you don't have any yet, no worries, there are some Freebies located on the new website.  They are located on the Home page, just scroll down a bit to see them:

The Winner and Top Three will be posted on the last day of each month.  The Winner will receive a $15 Gift Certificate to the new on-line store.  Please review all the Challenge Rules before submitting your photo.

We hope to see you soon in our new Facebook Group!


I fell in love with this sweet mermaid. I used the Tropical Mermaid Alana digital stamp set for this card. I sized and printed her out in the pre-colored version. Perfect! Here is the card I made using this really fun image!

I printed a second image too, along with the sentiment that we'll see next. I die cut the tail of the second image into a circle, mounted it onto a mini Action Wobble and mounted it above her for some dimension and to allow her tail to flick back and forth! It was really fun to flick her tail and watch her kinda dance. I also fussy cut part of her hair, covered it with Versamark Ink, then sprinkled on Clear Detail embossing powder and heat set it. I repeated this step several times and then on the final layer, I sprinkled on some Spring Willow embossing powder. I didn't cover the whole image, I just wanted some highlights in her hair. I heat set it a final time, and the Spring Willow embossing powder kinda marbleizes into the layers of Clear Detail embossing powder below it.

I also printed out one of the sentiments from this stamp set. I die cut it into a heart, and repeated the same Clear Detail layers as noted above. Then, I swiped more Versamark Ink pad along the outer edge of the heart and sprinkled on some more Spring Willow embossing powder, and heat set it again. This created a bit of a frame around the hear which was so pretty! While I was making all these layers, I also added in some Silver Pearl embossing powder on the shell, and heat set it. This gave the shell some sparkle and depth, but it was hard to capture in the photos.

Okay, I think my new FAVORITE embossing powder is Caribbean ... I repeated the layered Clear Detail embossing powder on some swirls that I die cut. Then, the final layer was a light sprinkling of Caribbean. I did just enough to get some color on the swirl but not covering it completely. I heat set it, and boy oh boy was it gorgeous! The colors are amazing and so gorgeous!!!! And, to frame up the edges of the card panels, adhered a strip of 1/8" "Tear-ific" Tape along the edges, and burnished in some Ocean glitter. Such a beautiful glitter!

I also did some swirls in the same marble technique but used the Ocean embossing powder ... which might be my other NEW favorite! Here is a close up of the beautiful blue tones in this embossing powder. Swoon! I also added a lot of dots around the card to make a lot of water bubbles. I made them with Caribbean Ocean Crystal Drops by Nuvo.

I hope you enjoy these new stamps! Now, you get to continue hopping along when you go to Jess's blog. I know you will LOVE what she has in store for you. She makes really FUN and GORGEOUS cards!!

Thanks for stopping by. Have a magical day!

-Chris

Sparkle N Sprinkle compensated links are used when possible.

Monday, June 12, 2017

Mom (and DAD!) Anniversary Card (#23/52) {06.12.2017}

Okay, this post should have been last week, since Mom & Dad's 55th Anniversary was Friday, June 9. But, when I mailed the package and card, the post said it would arrive on SATURDAY, a day late ... I didn't want them to see the card until it arrived, so I delayed this post. Let's check out the card I made for them for their 55th wedding anniversary, which is the Emerald anniversary. Since green is my favorite color, I had to, I mean I was COMPELLED to add in some GREEN. Yahoo!

I die cut "happy" in glittery green cardstock twice, and once with white cardstock. I layered them up for dimension and stability. This photo shows the layers as well as the scoring.

I created a cross-hatch score pattern for the background of the card (I totally stole this idea from Pinterest!). I scored the back of the card panel on the diagonal at every 1". Then, I spun the card 90 degrees, and scored the card panel again. I pressed a little extra hard on this scoring so that the ridges would stand out really well. Then, I adhered little green rhinestones from my stash.

I also stamped out "anniversary" sentiment using Versamark Ink and then sprinkled on Sparkle N Sprinkle's White Detail embossing powder and heat set it. I layered this strip across the card and adhered the "happy" die cut over it.

And, I layered a card panel inside the card. First, I lightly stamped a floral image background with really light ink. I stamped "congratulations" from Lawn Fawn's Scripty Sayings. I also used several alphabet sets to stamp out the rest of the sentiment. I used Harold's ABCs and Violet's ABCs.

Happy Anniversary Mom & Dad! I hope you have many more years to come :)

Thanks for stopping by. Have a magical day!

-Chris

Sparkle N Sprinkle compensated links are used when possible.

Thursday, June 8, 2017

Ph.inishe.D Graduation Card {06.08.2017}

Hi! I am thrilled to announce that I have been selected for the Cardz4Galz Design Team! This is my first post for the Cardz4Galz challenges! I am so honored to be part of this great group of wonderful designers, and look forward to learning from these fabulous ladies! Here is my Graduation Card for Challenge # 49.

I have a good friend who just finished her PhD in Education and I made this card for her. I know she will love it! I used Sparkle N Sprinkle's Graduation Bundle digi stamp, and printed out this fun sentiment. I die cut it with Lawn Fawn's (sadly, retired) Bannerific Lawn Cuts. Then, I blended on some distress inks to give the banner some added color.

I had fun with the other "sentiment" on the steps of this card. I spelled out "PhinisheD." I die cut the letters using Lawn Fawn's Quinn's Capital ABCs Lawn Cuts. I blended distress ink to the edges for more colors too. I also printed out the "inishe" letters with my printer and ink blended the edges too. And, I stamped a mortarboard using Lawn Fawn's Hats Off To You stamp set, colored it, and then stamped it again (using a MISTI stamp positioner) with Versamark Ink and then sprinkled on Sparkle N Sprinkle's Clear Detail embossing powder and heat set it. I also swiped on some Clear Wink of Stella to make some extra sparkle!

I wanted a lot of dimension for this card, so I also die cut out some mums using Heartfelt Creation's Enchanted Mum die. I cut several mum flowers, blended ink along the petals and edges, then shaped them and glued them together to make some dimensional flowers. This sure was fun! Once the mums were adhered, I also blinged up the center of the flower. I squeezed on some of the new Nuvo Deluxe Adhesive into a blob that filled the center of the flower. Then, I dumped on some of Sparkle N Sprinkle's Royal Purple Glass Glitter. This really made the center pop! So cool!!

For the blue flower, I used Sparkle N Sprinkle's Bronze Glass Glitter. So pretty!

I also die cut some floral swoops with some sparkly green cardstock. I tucked in these swirls behind the flowers for some added dimension.

I am beyond excited to be part of the Cardz4Galz group, and can't wait to see your amazing creations for our challenges!

Thanks for stopping by. Have a magical day!

-Chris

Sparkle N Sprinkle compensated links are used when possible.

Friday, June 2, 2017

Look Up To You Mom Card (#22/52) {06.02.2017}

I do look up to my Mommy, so this Mom & Me stamp set from Lawn Fawn was the perfect set to make another card for Mom.

I stamped out the fox holding the baby fox, then masked off the bottom portion of the stamp and stamped the wood stump. This made the fox look like it was sitting on top of the stump. Using colored inks, I stamped the butterflies, grass, sentiment, and heart.

I layered the card panel over Lawn Fawn's Perfectly Plaid Rainbow Collection paper, and layered both onto the card base.

My Momma is a wonderful lady, smart, progressive, kind, and generous. She has taught me some incredible things during my life, and is still supporting and guiding me. We all need a person like this in our corner! Thanks Mom!

Thanks for stopping by. Have a magical day!

-Chris

Sparkle N Sprinkle compensated links are used when possible.