Monday, July 30, 2018

Sparkle N Sprinkle Vintage Country Home Shadowbox Card [07.30.2018]

Hello from Designer Chris! Today's card is a digital card shadow box, using one of Sparkle N Sprinkle's latest July release stamp sets! This set is the Vintage Country Home and you couldn't get any more awesome than this set! Let's check out the shadow box card I created.

Supply List:
Sparkle N Sprinkle Vintage Country Home digi stamp [DIGI911DE]
Sparkle N Sprinkle Hickory glitter [GM2044]
Sparkle N Sprinkle 24 KT Gold glitter [GM2038]
Sparkle N Sprinkle Easy Green glitter [G1077]
Sparkle N Sprinkle Waterfall glitter [G1071]
Sparkle N Sprinkle Waterscape glitter [G1108]
Sparkle N Sprinkle 1/4" Tear-ific Tape [SAT01]
Sparkle N Sprinkle 3/4" Tear-ific Tape [SAT05]
Sparkle N Sprinkle Glitter Brush [SG1400]
Nuvo Deluxe Adhesive [200N]
Nuvo Smooth Precision Glue Pen [206N]
Nuvo Copper Penny Crystal Drops [654N]
Tonic Swirling Frame Layering Die Set [1462e]
Tonic Tangerine machine [138e]
Tonic 12" Wide Base Craft Guillotine [454a]


I started out by sizing this image from the Vintage Country Home stamp set on my computer, using Word. I used a pre-colored image to make it quick and easy! I printed it and then started die cutting and glittering! I die cut out the image using the Tonic Swirling Frame Layering Die Set and then rolled on some Nuvo Smooth Precision Glue Pen to strategic places, and sprinkled on glitter. I used Waterfall glitter for the clouds, Waterscape glitter for the windows, Easy Green for the trees and grass, and 24 KT Gold for the door and window frames. Here is a close up of the Vintage Country Home all sparkled up!

I also glittered up the outer edge. I laid a strip of 3/4" Tear-ific Tape to the backside of the image's die cut edge. I burnished in Hickory glitter, which adhered to the Tear-ific Tape which was exposed through the negative spaces of the die cut swirl edges. Here is a close up of awesome Hickory glitter!

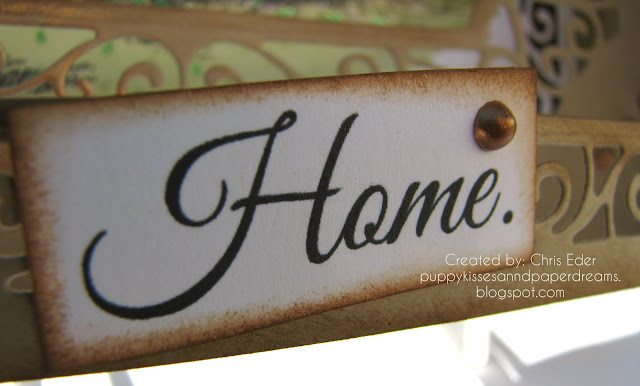
I printed out the sentiment, and cut each letter individually. I blended some ink to the outer edges of each word in the sentiment. I adhered the sentiment to the front of the shadow box, and dropped on some Nuvo Copper Penny Crystal Drops to the sentiment words too. I also added Nuvo Copper Penny Crystal Drops on the back and middle layers of the shadow box, and "smeared" some of the drops as well with my finger tool to give the card a little more distressed look. I also finished up the shadow box. I die cut two larger swirling frame dies, and then scored the edges of the cardstock and stacked them all up to make a shadow box. It worked out great!

For more card tutorials, please click on my blog, Puppy Kisses and Paper Dreams.

I really like shadow boxes, and this card came together pretty quickly and easily. I love using digital images because they can be sized and manipulated in multiple ways, and these ones from Sparkle N Sprinkle come both pre-colored and not-colored so you can do what you want with them!

Thanks for stopping by. Have a magical day!

-Chris

Sparkle N Sprinkle compensated links are used when possible.

Monday, July 23, 2018

Cupcake Rainbow Striped Card [07.23.2018]

Hello! A super sparkly, rainbow and cupcakes and cascading hearts card on the blog today! This card showcases Sparkle N Sprinkle's new Cupcake Rainbow stamp set for the July release. Let's check out all the fun and sparkle on this card!

Supply List:
Sparkle N Sprinkle Cupcake Rainbow digital stamp [DIGI908BG]
Sparkle N Sprinkle Unicorn Party digital stamp [DIGI907BG]
Sparkle N Sparkle Static Free Bag [99512]
Sparkle N Sprinkle Lemon Chiffon embossing powder [EP315]
Sparkle N Sprinkle Princess Rose embossing powder [EP387]
Sparkle N Sprinkle 1/8" Tear-ific Tape [SAT02]
Sparkle N Sprinkle Butterscotch glitter [GM2051]
Sparkle N Sprinkle Pink Fizz glitter [GM2050]
Sparkle N Sprinkle Margarita glitter [GM2032]
Sparkle N Sprinkle Gecko glitter [GM2045]
Sparkle N Sprinkle Ocean glitter [G1126]
Sparkle N Sprinkle Priceless Peacock glitter [G1015]
Sparkle N Sprinkle Marine Blue glitter [GM2049]
Sparkle N Sprinkle Gypsy Red glitter [GM2005]
Sparkle N Sprinkle Glitter Brush [SG1400]
Nuvo Deluxe Adhesive [200N]
Nuvo Smooth Precision Glue Pen [206N]
Photo Play Paper Crane Collection Pack / Koi Pond paper [PC8804]
Versamark ink [VM-001]
Tonic Easy Clean Craft Mat [1514e]
Tonic 12" Wide Base Craft Guillotine [454a]


I sized these pre-colored digi images on my computer, in Word. Once I had the sizes I wanted, I printed them with my ink jet printer onto white cardstock. I ripped the edges of the image to get a distressed look (more on that below) and then started decorating and embellishing the rainbow and cupcakes! I rolled on some Nuvo Smooth Precision Glue Pen onto each of the rainbow arches, and sprinkled on glitters: Gypsy Red for the red, Butterscotch for the yellow, Margarita for the green, and Pink Fizz for the purple/pink. I also used the same adhesive for the clouds and cupcakes, and sprinkled on Marine Blue for the blue, Butterscotch for the stars, and Pink Fizz for the cupcakes.

I laid out a bunch of hearts, and sized them smaller and smaller as they cascades away from the rainbow. I rolled on more Nuvo Smooth Precision Glue Pen onto the hearts, and sprinkled on Pink Fizz glitter. I just enhanced the hearts with glitter highlights, I didn't cover the entire heart, as you can see below.

I printed out the sentiment, trimmed it with my Tonic Guillotine cutter, and then swiped on Versamark ink along the edges, sprinkled on Lemon Chiffon embossing powder and heat set it. Here is a close up of the sentiment.

I layered the card panel over some patterned paper. I used the Koi Pond paper sheet from the Photo Play Paper Crane Collection Pack. When I pulled out this sheet, and saw those delicious rainbow stripes, I just knew I had to use the paper, and bling up those stripes! I laid down 1/8" Tear-ific Tape onto each of the stripes, and selected glitters to match the stripes as best I could. Here is a closeup of some of the stripes. Squeal! I LOVE this part of this card! Wow!

Here is a pile of the glitters that I used for the stripes. You can also see the patterned paper in the bottom left, with all the 1/8" Tear-ific Tape strips on each stripe. I revealed one stripe at a time, sprinkled on the coordinating glitter, burnished the glitter in, brushed it off with my awesome glitter brush, then went to the next stripe. This went pretty fast, and it sure was fun!

And, to cap it all off, after I ripped the edges of the digi stamp image, I swiped the edges with Versamark ink, and then sprinkled on Lemon Chiffon embossing powder and heat set it. I also cut another card panel, slightly larger than my stamp image piece, and swiped Versamark ink on that layer too. I sprinkled on Princess Rose embossing powder and heat set it. I layered these two together, and layered them over the patterned paper with glittery stripes.

I love this card. These coordinating glitters over the striped background paper makes me smile. I also love that sweet rainbow and the adorable hearts cascading down. Lots of bling and sparkle on this card - which is my cup of tea!

Thanks for stopping by. Have a magical day!

-Chris

Sparkle N Sprinkle compensated links are used when possible.

Wednesday, July 18, 2018

Sparkle N Sprinkle Unicorn Party card [07.18.2018]

Today’s card is using the new Unicorn Party digital stamp set, one of Sparkle N Sprinkle's new July stamp releases. I just loved this sweet little unicorn. I wanted to showcase all the images, and make it feel like a party. Let’s check out what I created using this awesome digi stamp set.

Supply List:
Sparkle N Sprinkle Unicorn Party digital stamp [DIGI907BG]
Sparkle N Sprinkle Journal Mixed Media stamp [00-606P5]
Sparkle N Sprinkle Butterscotch glitter [GM2051]
Sparkle N Sprinkle Pink Fizz glitter [GM2050]
Sparkle N Sprinkle Gecko glitter [GM2045]
Sparkle N Sprinkle Caspia Sea glitter [GM2048]
Sparkle N Sprinkle Glitter Brush [SG1400]
Nuvo Tropical Fruits Diamond Hybrid Ink [80N]
Nuvo Sea Siren Hybrid Ink [81N]
Nuvo Blue Topaz Glimmer Paste [960N]
Nuvo Smooth Precision Glue Pen [206N]
Nuvo Raspberry Rhodolite Glimmer Paste [964N]
Nuvo Simply White Crystal Drops [651N]
Tonic Scalloped Circle Layering Basics Die Set [1455e]
Tonic Swirling Frame Layering Die Set [1462e]
Tonic Tangerine [138e]
Tonic 12" Wide Base Craft Guillotine [454A]
Tonic Easy Clean Craft Mat [1514e]
Stampendous Butterfly Field Metal Stencil [FMS4083]


I started out by sizing all my images in a Word document and then I printed them with my color printer. I used the pre-colored digi images, which makes creating a card a breeze! I die cut out each image with my Tonic Tangerine machine and used the Tonic Scalloped Circle Layering Basics die set. I blended some ink onto the edges of the circles to help make the edges pop. I created my card base by die cutting a shape using the Tonic Swirling Frame Layering Die Set. I colored the cardstock with Copic markers to make it a solid blue. Then, I stamped the coffee cup stain and journaling stamps from the Journal Mixed Media stamp set using different Nuvo hybrid inks from the Sea Siren and Tropical Fruits collections (more on this below). Then, I laid the Stampendous Butterfly Field Metal Stencil on my background, and stenciled white embossing paste, Nuvo Blue Topaz Glimmer Paste, and Nuvo Raspberry Rhodolite Glimmer Paste through the stencil. I moved the stencil around so I didn't have a solid coverage anywhere, which was the look I was going for. I also squeezed on some Nuvo Simply White Crystal Drops to the edges and on some of the circles. You can see the full background and the images here.
I also added extra sparkle to the images. For the cupcake, I rolled on Nuvo Smooth Precision Glue Pen onto strategic parts of the cupcake and sprinkled on Caspia Sea, Butterscotch, and Pink Fizz glitters.

For the clouds, I rolled on more Nuvo Smooth Precision Glue Pen and sprinkled on Butterscotch glitter onto the yellow balloon, and Pink Fizz onto the pink balloon. I also sprinkled Caspia Sea onto the clouds.

I also blinged up the unicorn! I rolled on more Nuvo Smooth Precision Glue Pen and sprinkled on Caspia Sea and Pink Fizz onto the unicorn mane and tail. Check out this cute and sparkly unicorn!

Here is a closeup of the card panel. You can see the journaling stamp image and the "coffee cup stain" image from the Journal Mixed Media stamp. This stamp set was the perfect set to give some texture and color to my image without detracting from the unicorn.

I LOVE unicorns and this sweet little unicorn is just too adorable. This stamp set comes in both rubber and digi. Both are really fun, and I can't wait to see what you create! Remember, you can share your creations with us at Sparkle N Sprinkle Creative Challenge, which runs from the first to the 25th of each month. Find us on Facebook and show us your awesome creations!

Thanks for stopping by. Have a magical day!

-Chris

Sparkle N Sprinkle compensated links are used when possible.

Monday, July 2, 2018

Sparkle N Sprinkle Dahlia Card [07.02.2018]

Hi! Today's card is a Thinking of You card focusing on Sparkle N Sprinkle's Dahlia Stamp Set, which is gorgeous! Let's check out the card!

Supply List:
Sparkle N Sprinkle Dahlia stamp set [00-500P6]
Sparkle N Sprinkle Bonnet Bouquet stamp set [00-838P5]
Sparkle N Sprinkle Flourishes One stamp set [00-516P5]
Sparkle N Sprinkle Flowers Silhouettes stamp set [00-824P5]
Sparkle N Sprinkle Clear Detail embossing powder [EP280]
Sparkle N Sprinkle Amour embossing powder [EP314]
Sparkle N Sprinkle Cobalt Glaze glitter [GM2015]
Sparkle N Sprinkle Pink Fizz glitter [GM2050]
Sparkle N Sprinkle Butterscotch glitter [GM2051]
Sparkle N Sprinkle 2-1/2" Tear-ific Tape [SAT15]
Sparkle N Sprinkle 1/8" Tear-ific Tape [SAT02]
Sparkle N Sprinkle Glitter Brush [SG1400]
Anti Static Bag [99512]
Versafine Onyx Black ink [VF-82]
Versamark ink [VM-001]
Photo Play Paper Crane Collection Pack / Japanese Garden paper [PC8804]
Nuvo Simply White Crystal Drops [651N]
Nuvo Smooth Precision Glue Pen [206N]
Tonic Ornate Frame Layering Die Collection [1111e]
Tonic Tim Holtz Stamp Platform [1707e]
Tonic Tangerine machine [138e]
Tonic Easy Clean Craft Mat [1514e]


I stamped out the Dahlia images onto white cardstock with Versafine Black Onyx ink, using my Tonic Tim Holtz Stamp Platform. I sprinkled on Clear Detail embossing powder and heat set them. Then, I colored the dahlia images by blending ink over them with an ink blender tool. I fussy cut them as focus points for my card. I rolled on Nuvo Smooth Precision Glue Pen and sprinkled on glitters: Pink Fizz for the pink areas, and Butterscotch for the yellow areas. I also laid down a strip of 2-1/2" Tear-ific Tape onto some cardstock, and pulled off the release paper. I also laid down two strips of 1/8" Tear-ific Tape toward the outer edges of the exposed 2-1/2" Tear-ific Tape, and left the release paper. I burnished in some Butterscotch glitter onto all the exposed 2-1/2" Tear-ific Tape across the whole cardstock. Once it was burnished in good and well, I brushed off all the remaining glitter with the Glitter Brush. I pulled off the release paper from the two 1/8" strips and then burnished in Cobalt Glaze glitter. These blue lines really popped! I layered the glitter strips and dahlias over some patterned paper from the Photo Play Paper Crane Collection Pack, and then adhered this onto a card base. 

I treated some white cardstock with my Anti Static Bag, then stamped it using my Tonic Tim Holtz Stamp Platform and pink ink. I then cleaned my stamp (while still on the Stamp Platform) and then reinked the stamp with Versamark ink. I sprinkled on Amour embossing powder and heat set it. Then, I die cut the sentiment with the Ornate Frame Layering Die Collection. I rolled on more Nuvo Smooth Precision Glue Pen around the outer edge of the sentiment oval and sprinkled on Butterscotch glitter.

I also decorated the inside of the card. I lined the inside of the card with more patterned paper from the Photo Play Paper Crane Collection Pack. I trimmed some white cardstock with my Tonic Guillotine to make it a little bit smaller than the patterned paper so I could use the patterned paper as a frame to the white cardstock. I stamped out some flourishes from the Flourishes One stamp set in light inks around the edge of the cardstock. I also stamped the sentiment in the center with colored ink. I adhered all the layers together inside the card.

I made this card for Margaret, our Sparkle Queen and owner of Sparkle N Sprinkle. She is an amazing lady and I wanted to send her some happy mail. I hope she enjoyed it!

Thanks for stopping by. Have a magical day!

-Chris

Sparkle N Sprinkle compensated links are used when possible.