Monday, October 30, 2017

Lawn Fawn Goodie Bags {10.30.2017}

Hi! I made some little treat goodie bags using Lawn Fawn products, and am sharing them in the current Lawn Fawnatics Challenge 15 - Clever Gift Packaging. Here they are.

I started out by die cutting some Halloween patterned paper using Lawn Fawn's Goodie Bag lawn cut. I also cut out the roof, door, cat, tree, and ghost from black, green, and white cardstock, using the Scalloped Treat Box Haunted House Add-On lawn cut. I was really pleased that these two lawn cuts work so well together. It worked out perfect to use the Scalloped Treat Box Haunted House Add-On with the Goodie Bag ... I love versatility with the Lawn Fawn products, and this really stretched what I can create with different sizes and shapes of gift packaging! I assembled the Goodie Bag and adhered the add-on pieces. Then, I die cut out the star from the Tiny Tags lawn cuts, and stamped the "thanks" from the Tiny Tags Sayings stamp set. I stuffed the goodie bags with some truffles and then tied on the tag with Lawn Fawn Lime Green Lawn Trimmings.

All the folks I gave these gifties too really enjoyed them! They loved how the door opened, and how fun they were. I made a lot more than what are shown here, but you get the idea! Everything is funner if it is packaged in something fun like this!

Thanks for stopping by. Have a magical day!

-Chris

Sparkle N Sprinkle compensated links are used when possible.

Friday, October 27, 2017

Sparkley Stylin' Sayings Brush Strokes Card for Mom (#43/52) {10.27.2017}

Today's card is a bit of a change for me ... because I didn't use any die cutting! I LOVE dies but wanted to stretch myself and create a card without patterned paper and without die cuts to make sure I could actually create something without those two items. Plus, I wanted to do something fun with my Tim Holtz Stamp Platform. So, this is what I came up with. Let's check it out.

The first thing I did was create my card base. I trimmed some blue cardstock using my Tonic Studio 12" Wide Base Craft Guillotine, scored it, and then folded it and used my bone folder to smooth out the crease. Then, I trimmed a white cardstock panel 1/2" smaller than the card base so I would have a 1/4" edge all around the card panel. Then, I positioned the brush stroke image from Sparkle N Sprinkle's Demo Donna's Stylin' Sayings stamp set. Once I had it positioned in the Tim Holtz Stamp Platform, I inked up the brush stroke image with Nuvo Empire Blue hybrid ink and stamped it. I inked up the stamp again, and stamped it again in the same location (great use of the positioner!). Then, I slid the paper the width of the brush stroke stamp, cleaned the stamp, and inked it up with Nuvo Safari Green hybrid ink and stamped it again. I repeated with a second layer of ink, and then slid the paper again, and cleaned the stamp and then inked up with Nuvo Poppy Red hybrid ink, stamped the brush strokes and repeated a second layer. I kept doing this until I covered the entire panel with brush strokes. I then positioned the "confetti splash" stamp from the same stamp set and stamped it with gold and silver inks from my stash. I also stamped out the "Sparkle" sentiment from the stamp set in Versafine Black Onyx ink. Then, I squeezed on some Nuvo Crystal Drops in Woodland Green, Caribbean Ocean, and Strawberry Coulis colors.

I really like using the Tim Holtz Stamp Platform for repeated stamping, and this card was a lot of fun to make.

Thanks for stopping by. Have a magical day!

-Chris

Sparkle N Sprinkle compensated links are used when possible.

Thursday, October 26, 2017

Cardz for Galz Favorite Flower Challenge Card {10.26.2017}

Hello! This current challenge at Cardz 4 Galz is Favorite Flower and Why ... My favorite flower is the cherry blossom. I like a LOT of flowers, but the Cherry Blossom is elusive, fragile, short-lived, and serene and peaceful. I love everything about them, except that they don't last long. They are also the flower I tend to use when I want to create a card for somebody who needs a boost or to share peaceful thoughts. They are my definite go-to flower! Here is the card I made.

I created the background by watercoloring some blues onto watercolor paper. When it dried, I die cut it with Lawn Fawn's Stitched Journaling Card for my card panel. I cut a card base from black cardstock. Then, I watercolored more watercolor paper with shades of pink distress inks, and spritzed them with some gold and silver shimmer sprays. I also colored the branches with brown distress inks. Once these dried, I die cut them with a Spellbinders Cherry Blossom dies to create the branches and blossoms.

Here is another shot of the branches and blossoms over the background. I just love these cherry blossoms and can't get enough of these flowers!!

I can't wait to see what all of your favorite flowers are, and hear about why you love them.

Thanks for stopping by. Have a magical day!

-Chris

Sparkle N Sprinkle compensated links are used when possible.

Wednesday, October 25, 2017

Sparkle N Sprinkle Lovely As a Leaf Card {10.25.2017}

Hi! Designer Chris reporting in for duty, with a Lovely as a Leaf stamp set card! I did a lot of layers on this one, and had a lot of fun with sparkly additions of gilding flakes, Nuvo drops, and embossing powders. Let's check it out.

I started by stamping out the Lovely as a Leaf stamp set, using Versafine Onyx Black ink, and then sprinkled on Clear Detail embossing powder and heat set it. Then, I colored the leaf in with watercolor markers. I die cut out the image with Tonic's Scalloped Square Layering Basics Die Set. And, I also second-generation stamped out the leaves from the stamp set with the Versafine Onyx Black ink too (second generation means I ink up the stamp as normal, stamp it onto some scrap paper, then stamp it for a second time without re-inking, onto the spot I want the stamp to appear. This makes the image appear much lighter than normal stamping).

For the edges of the layers, I rubbed the Nuvo Glue Pen Large size all over the leaves stamps and stamped them to the outer edges of white cardstock. I let this dry to tacky, and then rubbed on Gilding Flakes in Sunkissed Copper and Radiant Gold. I burnished them in with my finger tool, then removed all the excess gilding flakes with the Mini Blender Brush Set. After I layered everything together, I squeezed on some Nuvo Crystal Drops in Copper Penny and Honey Gold. I also created some additional layers with the Mixed Edge Oval Layering Basics Die Set.

For the sentiment, I stamped the sentiment, using my Tim Holtz Stamp Platform, and inked up the stamp with Versamark Ink. I sprinkled on some Golden Follies embossing powder and heat set it. I die cut the sentiment panel with the Scalloped Square Layering Basics Die Set and matted it with a square of black cardstock using my awesome 12" Wide Base Craft Guillotine trimmer. And then squeezed on some more Nuvo Crystal Drops in Ripened Pumpkin.

I also stamped out another layer for this card by stamping the leaves with Versamark Ink and sprinkled on more Golden Follies embossing powder and heat set it. Here is a photo of this layer. Note, I just stamped the outer edges of this layer since that is all that would show.

I finished off the card with a big bow and created a ribbon by dredging some 1/4" Tear-ific Tape through a pile of Golden Follies embossing powder. I heat set this and then wrapped it around the bow to give a little something extra. This was a fun card to make and it makes me think fall is really really close....

Thanks for stopping by. Have a magical day!

-Chris

Sparkle N Sprinkle compensated links are used when possible.

Sunday, October 22, 2017

Mom Shell Card (#42/52) {10.20.2017}

Hi! Today's card for Mommy is pretty simple. I used some patterned paper I have had in my stash for a while. I love the beach and shells, and bought this paper a while ago but have never used it. But, I saw it when I was digging through my stash to create a card for Mom, and I figured I could whip out a card for Momma using this gorgeous paper! So, here it is.

I trimmed this patterned paper using my Tonic Studios 12" Wide Base Craft Guillotine paper, and adhered it to the front of a blue cardstock base. I also cut a square of the patterned paper out, matted it with black cardstock, and mounted it on foam tape and adhered it to the front of the card panel. Then, I squeezed on some Honey Gold Nuvo Crystal Drops and added some dots of white gel pen around the edges.


A nice simple card that is nautical, beachy, and full of shells and blues and greens of the sea. I love it! I know Mom will enjoy it too.

Thanks for stopping by. Have a magical day!

-Chris

Sparkle N Sprinkle compensated links are used when possible.

Wednesday, October 18, 2017

Sparkle N Sprinkle Farm Fresh Card {10.18.2017}

Hi! I have two of the newest, hot of the presses Sparkle N Sprinkle October release stamp sets to share with you today! Check out how I showcased these two sets from Sparkle N Sprinkle with my Farm Fresh card! Let's check it out.

I stamped out images from both the Farm Fresh - Tractor Set #1, and the Farm Fresh - Cows Set 2 using Versafine Black Onyx ink, and the Tim Holtz Stamp Platform. Because I wanted a really solid silhouette image, I restamped several times, and the Tim Holtz Stamp Platform really worked well! I sprinkled on Clear Detail embossing powder over the tractor and cows, and heat set it. I trimmed the stamped cardstock using my Tonic Studio 12" Wide Base Craft Guillotine, dusted it with the Anti Static Bag, and then swiped the edge with Versamark Ink and sprinkled on Copper embossing powder and heat set it. I also die cut two different sizes of cardstock using the Tonic Swirling Frame Layering Die Set. I ink blended one size, and wood-grain dry embossed the larger one. I swiped Versamark Ink and sprinkled on Copper Dreams embossing powder on the edges of the ink blended one, and heat set it. I also layered all this together and put it on a black cardstock base. I squeezed on some Nuvo Copper Penny Crystal Drops in the corners.

I also squeezed on some Nuvo Honey Gold Crystal Drops on the edges of the image panel.

I also sprinkled on some Fleur de Lis embossing enamel powder on the image panel. I heat set it from the bottom since the chunks are pretty big and they fly off easy. So always heat from the bottom with these types of embossing powders. I also stamped out the sentiment using Versamark Ink, die cut it with the Tonic Swirling Frame Layering Die Set die, and edged it with Versamark Ink and sprinkled on more Copper Dreams embossing powder and heat set it. I squeezed on a row of Nuvo Copper Penny Crystal Drops and adhered it to the card front.

I live in some farm country, and these two stamp sets are so much fun. I love the rustic feel of both of these sets and I can't wait to use them again.

Thanks for stopping by. Have a magical day!

-Chris

Sparkle N Sprinkle compensated links are used when possible.

Sunday, October 15, 2017

Happy Thoughts Mom Card (#41/52) {10.13.2017}

Another card for Mommy! This one was something outside of my comfort zone, but pretty fun! Here is the simple front ... but the magic is on the inside!

I used a die that popped up the inside and created a lot of dimension. You can see it immediately below! I used a lot of the die cuts in the set to die cut different papers for the decorative elements. I also stamped out a sentiment from Lawn Fawn's Happy Happy Happy stamp set using Versamark Ink. Then, I sprinkled on Sparkle N Sprinkle's White Detail embossing powder and heat set it. I adhered all the layers using Nuvo's Deluxe Adhesive. I also die cut the inside card panel's edges with Lawn Fawn's Stitched Scalloped Borders die.

I also used Lawn Fawn's Happy Happy Happy stamp set to stamp out part of the sentiment, and then die cut the "happy" from the coordinating die and stamped it too. I used Versamark Ink and then sprinkled on Simon Says Stamp's Steel Navy embossing powder. Look at that gorgeous color! I did this on the front panel of the card, that I had cut from Lawn Fawn's Stitched Rectangle dies. Then, I distressed the edges with brown distress ink.

Here is another photo of the dimension of the inside.

And, here is a shot from above, to show the dimension and fun pop-out that this card has. It folds perfectly flat, but when opened, it has this awesome 3-D dimension! I love this die!

Brace yourself ... you might be seeing this die a LOT because I love how it works out and the dimension it gives. I hope Mom likes it.

Thanks for stopping by. Have a magical day!

-Chris

Sparkle N Sprinkle compensated links are used when possible.

Saturday, October 14, 2017

Sparkle N Sprinkle October 2017 Reveal {10.15.2017}


Welcome to the Sparkle N Sprinkle
 October New Reveal Blog Hop!


We are now revealing our new stamp sets on the 15th of each month.  On the first of the month, a new video kit club will be revealed.


NEW STORE - NEW BLOG - NEW PRODUCT LINES! 

We are continuing to add new product lines, so be on the look out for them.  


We have four new rubber stamp sets and one digi only stamp set being revealed this month.  

The sets are:


Lovely As A Leaf 869
(Digital Version: DIGI869FS)

(Digital Version: DIGI871BG)


When you purchase the digi versions of any of the SNS rubber sets, you are getting lots of extras that aren't available otherwise.  These extras include additional images and/or sentiments not available with the rubber version, digi papers (in some cases), and a cut file to use with your electronic cutting machines will also be included with all digi images purchased!

You're definitely going to want both the rubber versions as well as the digi versions of all our new releases.

The new sets are 20% off until the 20th of the month.  So once you finish the blog hop, head on over to the New Store and start shopping.

On the 17th of the month, ONE GRAND PRIZE WINNER will be selected from the comments left on the Designers' blogs listed below. Please leave a comment with each Designer in order to be eligible for the Grand Prize.  You never know who the Mystery Designer will be that has the winning comment.

The Grand Prize Winner, which will be announced on the SNS Facebook page and the SNS Blog, will receive ALL of the new rubber stamp sets revealed this month.


The Blog Hop Order this month is:

Jess
Belinda
Diane
Eret
Shona
Donna
Chris.....You are HERE!


(*Tip: if you have difficulty with a particular link, try clicking on the Designer's blog title to send you to their Home page.)


We hope you enjoy the New Reveal Blog Hop as much as we do.  Thanks for joining us and remember to comment on each of the Designers' blogs to be eligible for the Grand Prize. (This is checked for compliance.) 

 Wonder who the Mystery Host will be this month????


Have you checked out the SNS YouTube Channel featuring Demo Donna?  If not, then you are in for a real treat.  Subscribe today to get all the latest Demo Donna tips and techniques!


 The new and improved Sparkle N Sprinkle Creative Challenge group is up and running on Facebook.  Click on the link and ask to join today.  This is a closed group, but we want anyone who wants to participate to join (just trying to keep out spammers 😀).  Come join in one the fun today!

 The challenges will run from the 1st - 25th of each month.  A SNS image (either rubber or digi) needs to be used.  If you don't have any yet, no worries, there are some Freebies located on the SNS website.  They are located on the Home page, just scroll down a bit to see them:

The Winner and Top Three will be posted on the last day of each month.  The Winner will receive a $15 Gift Certificate to the new on-line store.  Please review all the Challenge Rules before submitting your photo.

We hope to see you soon in our new Facebook Group!


And now a little bit about my card!

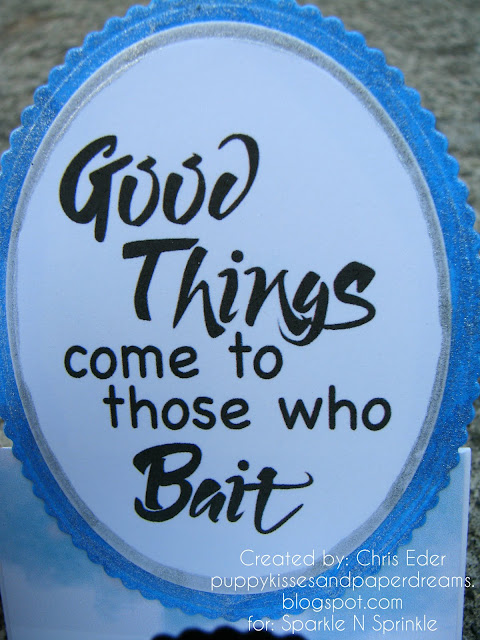
I used the Gus - Fish Whisperer digi stamp for my reveal card. I love this grumpy old man and his fish. Using my computer, I sized and printed out the pre-colored image onto white cardstock. I partial die cut the image using Tonic Studios Mixed Edge Oval Layering Basics Die Set, and avoided the fishing rod end that poked outside of the oval. I fussy cut around the fishing pole. Then, I matted the oval with black cardstock. Here is the card using the Step Card Base.

I printed out several extra fish in multiple sizes. I fussy cut all the fish, and then rolled on some Nuvo Glue Pen Small pen and sprinkled on Pinkerbell glitter to them. I layered one of the extra fish over the fish on the rod. Here is the closeup.

I used a lot of other glitters too. For Gus's pants, I used Mermaid and Pinkerbell glitters. I also used Creamsicle and Sunset glitters on the cattails, and Easy Green on the leaves. Here is a close up of all of this gorgeousness!

I also printed out one of the sentiments, and then die cut it with the Tonic Studios Mixed Edge Oval Layering Basics Die Set, and also die cut the next larger size. I then used the Midnight Shadows Glitter Marker set and colored the outer edge of the two ovals with the silver and the blue markers from this set. This photo doesn't even capture how awesome and sparkly these glitter markers are!

I had decided to create this card using the Step Card Base, but needed to add some more color and images to the card base itself. Because I was using the digi version of this stamp set, I went back to my computer and created more. I cropped the bottom of the image, under Gus's feet, and then increased the size of the image and made it really huge. I also cropped and flipped the cattail image and put the two mirror images side by side and printed out all of these. I die cut the cattail images with the Tonic Studios Mixed Edge Oval Layering Basics Die Set, for the image and the black cardstock matting. I trimmed the blown up image of the ground under Gus's feet, using my Tonic Studio 12" Wide Base Craft Guillotine cutter (which I LOOOVE!). Then, I layered everything onto the step card base using the Nuvo Deluxe Adhesive. I also adhered a pile of glittered, fussy cut fish to show that Gus has had a great day of fishing. I dusted off all the excess glitter using the Glitter Brush, and, then this card was done!

I love all the stamps for this reveal, and I know you will too. I am the last stop on the blog hop, so if you haven't hopped all along the way, start at Jess's blog, and make sure you comment on ALL the blogs to be eligible to win the prize!

Thanks for stopping by. Have a magical day!

-Chris

Sparkle N Sprinkle compensated links are used when possible.

Thursday, October 12, 2017

Monochromatic Birthday Cardz 4 Galz Challenge Card {10.12.2017}

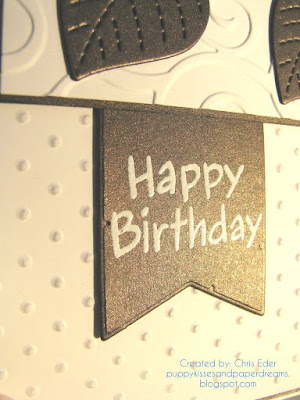
Hello! Today's card is for the current Cardz 4 Galz Challenge: Monochromatic, chosen by me! I love bold, vivid colors, so this is a stretch for me to do a monochromatic card. I used white cardstock, and a glittery gold/bronzeish cardstock. Here is the card.

I used embossing folders to add some texture to the white cardstock. I framed the white pieces with the colored cardstock, and die cut out some leaves from Lawn Fawn's Stitched Leaves dies. I added three leaves to the panel. Here is a photo of them.

And, for the sentiment, I stamped out the Happy Birthday from Lawn Fawn's Bake Me a Cake (sadly recently retired) using Versamark Ink, and then sprinkled on Sparkle N Sprinkle's White Detail embossing powder and heat set it. I die cut the sentiment using Lawn Fawn's Tag You're It die, and layered this sentiment banner behind the panel.

I liked how clean and bright this card is. I hope you enjoyed it too!

Thanks for stopping by. Have a magical day!

-Chris

Sparkle N Sprinkle compensated links are used when possible.

Sunday, October 8, 2017

Butterfly Hello Card for Mom (#40/52) {10.06.2017}

Hi! This week's card for Mom was a lot of fun. I created a butterfly card with a hello sentiment, all stuck down to a glitter strip! Let's check it out.

I die cut the Hello sentiment using Lawn Fawn's Scripty Hello, and foiled it with pink foil. Then, to jazz it up even more, I squeezed on Nuvo White Blizzard Crystal Drops. You can see the depth and sparkle here.

I stamped out the butterfly using Versafine Black Onyx ink, then sprinkled on Sparkle N Sprinkle's Clear Detail embossing powder. I heat set it, then colored the image with Prismacolor pencils. Then, I squeezed on more Nuvo White Blizzard Crystal Drops over the middle of the butterfly body, and on spots on the wings.

To finish off the card, I laid a strip of Sparkle N Sprinkle's 1-1/2" Tear-ific Tape across the middle panel of the card. I pressed in the butterfly and the hello sentiment. Then, I covered the remaining adhesive with Sparkle N Sprinkle's Waterfall glitter. This gave a sweet translucent glitter cover down the center of the card. So pretty!

I love how this came together. I hope Mom enjoys it too!

Thanks for stopping by. Have a magical day!

-Chris

Sparkle N Sprinkle compensated links are used when possible.

Wednesday, October 4, 2017

A Puppy's Halloween Sparkle N Sprinkle card {10.04.2017}

Hello! Today's card is a sweet puppy, getting ready for Halloween. I used the A Puppy's Halloween stamp set. I also used some Tonic Studios dies: Autumnal Oak Die Set, Mixed Edge Oval Layering Basics Die Set, Swirling Frame Layering Die Set. Here is the card:

Here is the close up of the puppy! I cut some cardstock, using my 12" Wide Base Craft Guillotine paper cutter, and stamped him out using Versafine Black Onyx ink using the Tim Holtz Stamp Platform. I colored him with Copic markers, then I replaced him back in the Tim Holtz Stamp Platform and inked it again with Versafine Black Onyx ink. I sprinkled on Clear Detail embossing powder and heat set it. This gave some great dimension to the black lines of the puppy! I also used my Nuvo Glue Pen Small to roll on adhesive to the puppy dog and the straw in the broom. I used Rose Gold and Evening Glow respectively!

I blinged up the hat ... I rolled on some adhesive using the Nuvo Glue Pen Small and sprinkled on Hyacinth and Creamsicle glitters. I dusted off the remaining glitter with my Glitter Brush, which works so great!

I stamped out my sentiment using the Tim Holtz Stamp Platform with Versamark Ink, after treating the cardstock with my Anti Static Bag. I sprinkled on Tangy Tangerine embossing powder and heat set it. Then, I die cut the sentiment using the Tonic Mixed Edge Oval Layering Basics Die Set, and I also die cut a piece of white cardstock with the next larger size up. I swiped more Versamark Ink on the edges of the larger oval, and then sprinkled on more Tangy Tangerine embossing powder and heat set it. I repeated this to add a second layer to add even more embossing powder.

I also blinged out the edges of the Tonic Swirling Frame Layering Die Set and then layered some 3/4" Tear-ific Tape behind the negative space of the frame. Then, I smooshed in more Hyacinth and Creamsicle glitters into the adhesive. This created a really fun, sparkly background behind the swirling frame!

I also went wild and crazy with the oak leaf die from the Autumnal Oak Die Set. I die cut out orange and yellow cardstock. Then, I rolled on Nuvo Glue Pen Large adhesive to the Crackle Background stamp. I let the adhesive dry to tacky, and then rubbed on some Radiant Gold and Sunkissed Copper Gilding Flakes. I burnished these in and then dusted off the gilding flakes with my Mini Blender Brush. I adhered the leaves all around the image with the Nuvo Deluxe Adhesive.

I am looking forward to fall and Halloween, and this card definitely puts me in the mood! I know you will love this stamp set!!!

Thanks for stopping by. Have a magical day!

-Chris

Sparkle N Sprinkle compensated links are used when possible.

Monday, October 2, 2017

Rainbow Bridge Dog Card {10.02.2017}

My dear friend lost her dog recently. I made her this Rainbow Bridge card to honor her sweet dog. He was 16 years old. Let's check out the card.

I combined a lot of stuff to create this card. The first thing I did, was stamp out the dog image using my Tim Holtz Stamp Platform. I stamped the dog from Sparkle N Sprinkle's Pet Sympathy stamp set using Versafine Black Onyx ink. I removed it from the stamp platform, colored it with Prismacolor pencils, then placed it back into my stamp platform and stamped it with Versafine Black Onyx ink again. I sprinkled on Sparkle N Sprinkle's Clear Detail embossing powder and heat set it. This stamp platform makes this technique really easy to do! I have found that colored pencils kinda dull the black lines of the stamped image. Doing the re-stamp after coloring brightens up the lines, and this also allows me to put on the embossing powder after I color it. Sometimes it is difficult to color close to an embossed line, or I color too close and then break off a piece of embossing. The stamp platform solves all of these issues! I also squeezed on some Nuvo Crystal Drops on the flowers, the wings, and the halo.

I also stamped out a sentiment from the Pet Sympathy stamp set. I again used my Tim Holtz Stamp Platform to stamp out the sentiment, and stamped it with Versamark Ink onto white cardstock. I sprinkled on Sparkle N Sprinkle's White Detail embossing powder and heat set it. I then die cut it using Tonic Studios Layering Basics Die Set Mixed Edge Oval. This set is really fun because it alternates between smooth edge and scalloped edge ovals in increasing sizes. After I die cut the white oval, I blended some pink distress ink over the opening of the die. This kept the outer edge white. I removed the die, and then added some additional sparkle with the Wink of Stella clear glitter pen. It is really sparkly in person, but here is a photo showing some of the sparkle over the sentiment.

And, I also used the Simon Says Stamp September Card Kit to add even more fun to the card. I used some of the patterned paper from that kit as a card panel behind the main image. I also stamped out the heart from the Best Ever several times, with Versamark Ink, and sprinkled on Sparkle N Sprinkle's White Detail embossing powder and heat set it. I blended distress inks onto each of the hearts and made a rainbow. I fussy cut the hearts out, then squeezed on one little drop of Nuvo Crystal Drops on each heart. I arranged them under the sentiment oval. Here is a close up of some of them.

I also stamped out the inside of the card with another sentiment from the Sparkle N Sprinkle's Pet Sympathy stamp set using Versafine Black Onyx ink.

I know my friend is missing her doggie, and I hope she knows how sad I am for her loss. I am sending her hugs.

Thanks for stopping by. Have a magical day!

-Chris

Sparkle N Sprinkle compensated links are used when possible.