SPARKLE N SPRINKLE MAY 1ST REVEAL

SPARKLE N SPRINKLE MAY 1ST REVEAL
May Reveal Blog Hop!
NEW STORE - NEW BLOG - NEW PRODUCT LINES!
NEW STORE - NEW BLOG - NEW PRODUCT LINES!
There are EIGHT new rubber stamp sets being released this month, plus a new Digi Papers set, and two huge Digi Bundles.
The sets are:

840 - Happy Flowers
(digi version DIGI840FS - see below)
844 - True Beauty
(digi version DIGI844B)
(digi version DIGI845BG)
846 - Flower Girl-Magic in You
(digi version DIGI846BG)

847 - Kaitlyn Mermaid
(digi version DIGI847LS)
848 - Rory Batter Up
(digi version DIGI848LS)
(digi version Digi849-850B - see below)
850 - Graduation-Party Time
(digi version Digi849-850B - see below)

Digi849-850B - Graduation Bundle (combines both sets plus includes additional images)
Digi840FS - Happy Flowers Bundle (includes additional images, decoupage sheets, digi papers)
Digi4004FS - Rainbow of Pastels Patterned Paper Pack (Digi Papers)
The new sets are 20% off until May 3, 2017, so after the blog hop, hop on over to the NEW STORE and have fun shopping - be sure to check out the OTHER amazing new products as well!
Be sure to check out the new SNS Blog, which can be found here!
On May 3, ONE GRAND PRIZE WINNER will be selected from the comments left on all the Designers' blogs listed below. Please leave a comment with each designer to be eligible for the Grand Prize (checked for compliance). The Grand Prize Winner will be announced on the SNS Facebook page and the SNS New Blog.
Also, when you purchase the digi versions of any of the SNS rubber sets, you are getting lots of extras that aren't available otherwise. These extras include additional images not available with the rubber version, digi papers (in some cases), and now a cut file to use with your electronic cutting machines will also be included with all digi images purchased!
You're definitely going to want both the rubber versions as well as the digi versions of all our new releases.
The new sets are 20% off until May 3, 2017. So once you finish the blog hop, head on over to the New Store and start shopping.
On May 3rd, ONE GRAND PRIZE WINNER will be selected from the comments left on the Designers' blogs listed below. Please leave a comment with each Designer in order to be eligible for the Grand Prize. You never know who the Mystery Designer will be that has the winning comment.
The Grand Prize Winner, which will be announced on the SNS Facebook page and the SNS New Blog, will receive ALL of the new rubber stamp sets revealed this month.
The Blog Hop Order this month is:
Chris <<<<<<You are HERE!>>
(*Tip: if you have difficulty with a particular link, try clicking on the Designer's blog title to send you to their Home page.)
We hope you enjoy the New Reveal Blog Hop as much as we do. Thanks for joining us and remember to comment on each of the Designers' blogs to be eligible for the Grand Prize.
Wonder who the Mystery Host will be this month????
 Have you checked out the SNS YouTube Channel featuring Demo Donna? If not, then you are in for a real treat. Subscribe today to get all the latest Demo Donna tips and techniques!
And, now a little about my card! I fell in love with this True Beauty stamp set. Peacocks? Yes please! I LOVE them! I love blues and greens together, and I have seen plenty a real-live peacock while vacationing in Hawaii. They are so beautiful. So, when I saw this stamp set, it zoomed immediately to the top of my wish list! Here is the card I made.
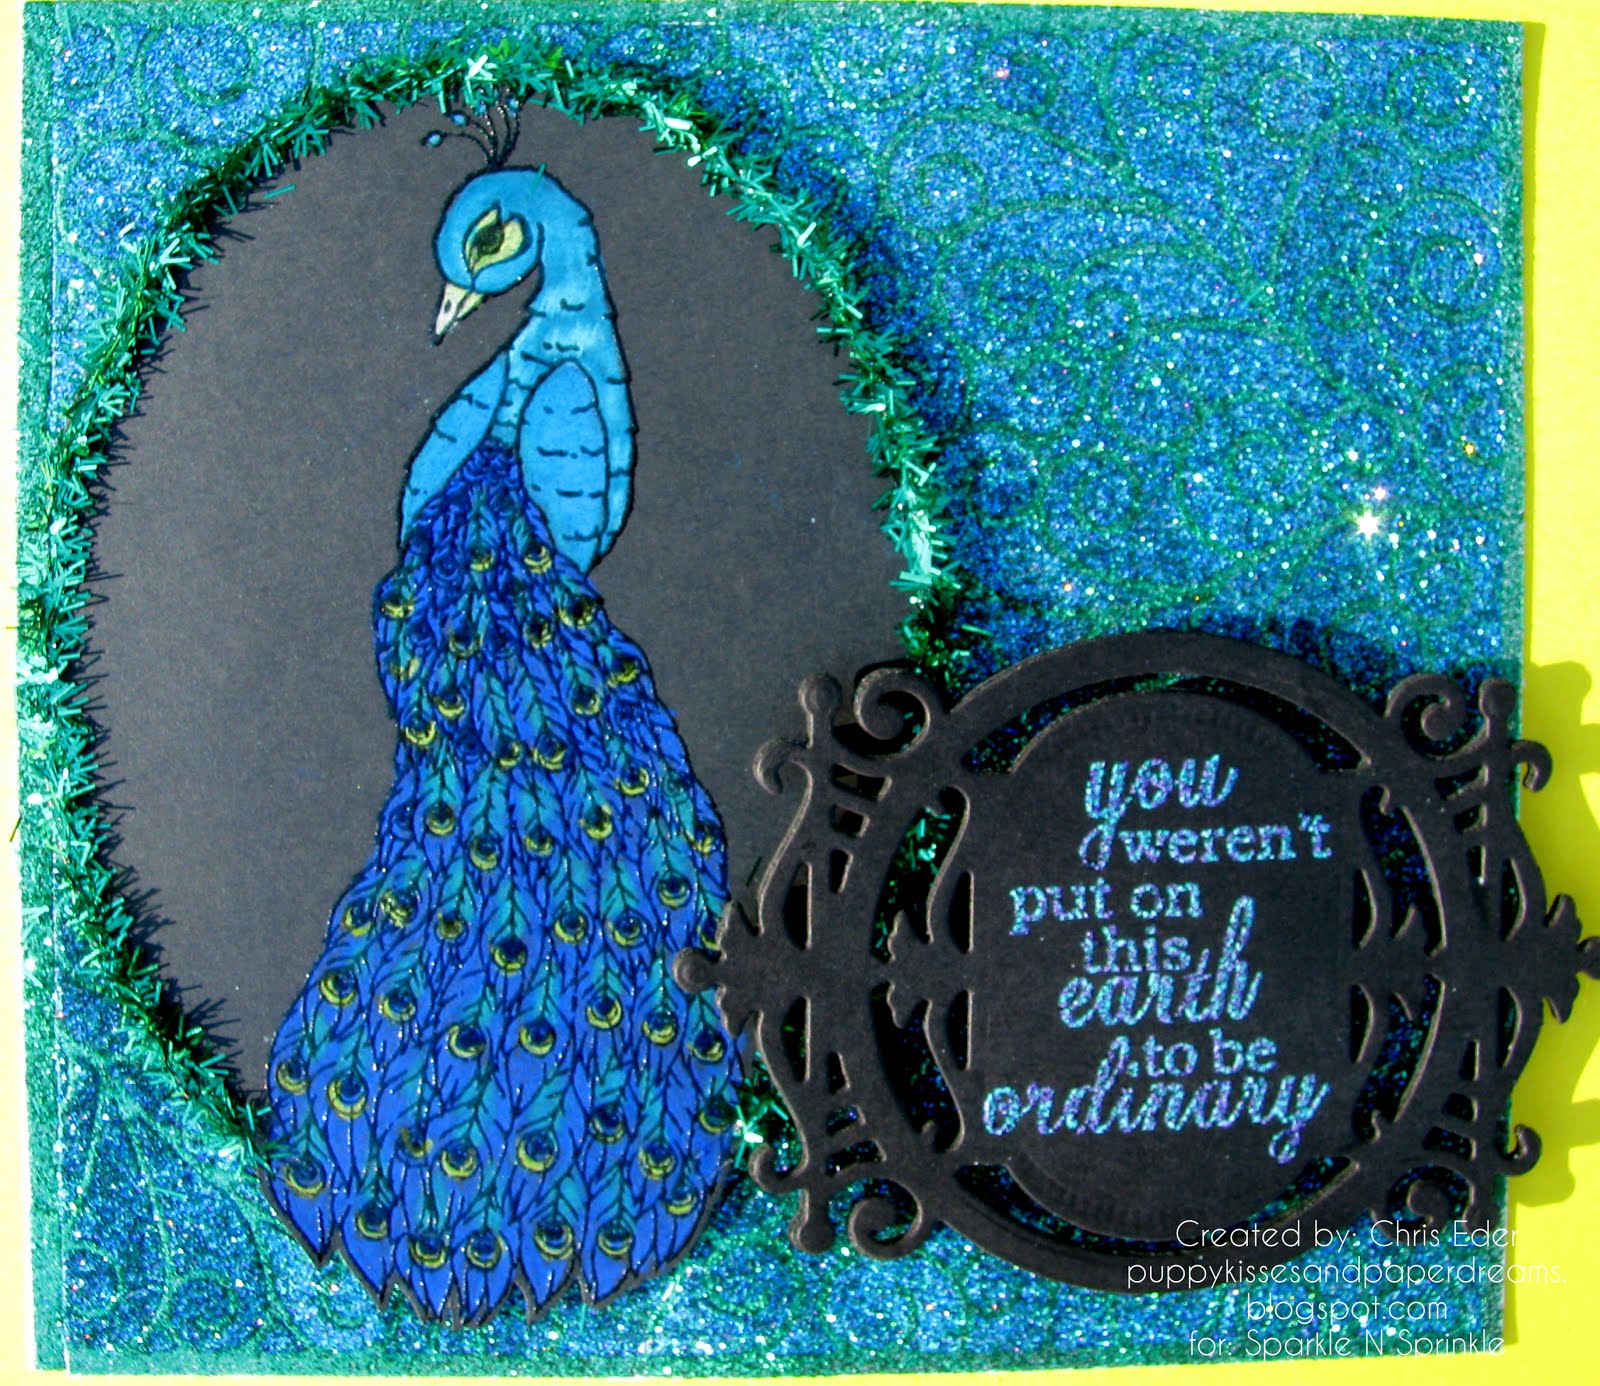
I wanted some contrast to my card, and some drama to the coloring. So, I took a leap and did something I have never done before ... I stamped onto dark cardstock (Black!) and COLORED it with pencils! Who knew that it was this easy and dramatic and fun!?! I always thought coloring over dark cardstock would involve laying down a base color, like paint primer, and then coloring OVER all of this ... Nope! All I had to do was color with pencils right over the black, and it worked out GREAT! All the colors pop and completely cover the cardstock. I highly encourage you to try this. Here is what my peacock looked like after coloring.


Here is another image of this card. I wholeheartedly recommend stamping onto dark cardstock and coloring your image with pencils. This was my first attempt at this, and it will certainly not be my last! It works out so well, and the colors are incredibly vivid.

This card makes me really happy and I hope you give this technique a try. I know you will enjoy the results. This True Beauty stamp set is absolutely incredible, and I know you will love it too!
I am the LAST STOP on the blog hop ... If you didn't start at the first stop, head straight to Jess's blog so you can keep hoppin'!
Thanks for stopping by. Have a magical day!
-Chris
Sparkle N Sprinkle compensated links are used when possible.
Thanks for stopping by. Have a magical day!
-Chris
Sparkle N Sprinkle compensated links are used when possible.
Fabulous card and design Chris! Love that you created this on black cardstock.
ReplyDeleteHi, Chris:
ReplyDeleteYour embossing is amazing, and this peacock couldn't possibly be more stunning. What a fabulous stamp set, and you've done an amazing job bringing it to life. Thank you for all the wonderful inspiration using the new Sparkle N' Sprinkle stamps. What an awesome release.
Blessings,
Karen L
www.karen-mycuprunnethover.blogspot.com
Gosh, Chris, I don't even know what to say! I've already pinned your beautifully colored peacock to my colored pencils board. What brand of pencils did you use? What color ink did you stamp with in the beginning? Black on black? Was it visible enough to see for the coloring? I wondered how you could use colored pencils and get into the detailed crevices so well. I am assuming you colored this in your MISTI? Or did you stamp it, and then when it was finished being colored, you put the paper exactly in the same spot to restamp it and apply the EP? It's a fantastic idea to emboss it AFTER the coloring, because my prismacolor pencils always leave a waxy build up. I'd never thought about using my MISTI, though. That opens whole new possibilities! Your coloring details are spectacular.
ReplyDeleteYour whole glitzy, glittery card is amazing. I have not done the KISS technique by myself yet. I keep thinking I will cut all the way through the SAS sheet. I need to do it, because certainly it is not difficult, and produces such fantastic effects! I'll try soon. Thanks for the inspiration, and for the beautiful design class tonight! hugs, de
WOW! Your card is a stunner! All those pretty colors - just amazing! I love how you colored...wow! I keep saying WOW because that is what comes to mind! :) Just a great, great card!
ReplyDeleteLove this Chris. The color combination is amazing and all those glitters and tinsels just blend perfectly. Your coloring is exceptional - thanks for the tip on the coloring with pencils on black!
ReplyDeleteWow, the detail in the peacocks tail is amazing. Such a great, and beautiful card.
ReplyDeleteThat peacock is amazing, thank you for sharing!
ReplyDeleteBeautifully created Chris, lots of work on that gorgeous peacock but well worth it...love all the sparkle-y goodness and beautiful peacock colors! another stunning creation! (my flower pot does not open, but I have a little blurb on the post with a few options to make it open with a pull out sentiment if preferred.)...thanks for the every nice comment!
ReplyDeleteOh my goodness, this is gorgeous!!! The colors and all the glitter is just stunning. I just love everything about this so beautiful!!!
ReplyDeleteYour card is adorable. Love the blue color and all the sparkle.
ReplyDeleteValerija xx
That peacock is stunning and your card is gorgeous. Love the glitter surround. Hugz
ReplyDeleteStunning project. Thanks for sharing
ReplyDeleteStunning card! You have done this peacock proud!
ReplyDeleteThis is a gorgeous work of art, Chris. LOVELY!
ReplyDeleteSierra Winters
www.sierrasgift.blogspot.com
This was my favorite card out of all of the designer blogs! Thank you!
ReplyDelete